Orders and refunds
Looking up what has been sold today, and putting money back when a customer returns something.
Find an order
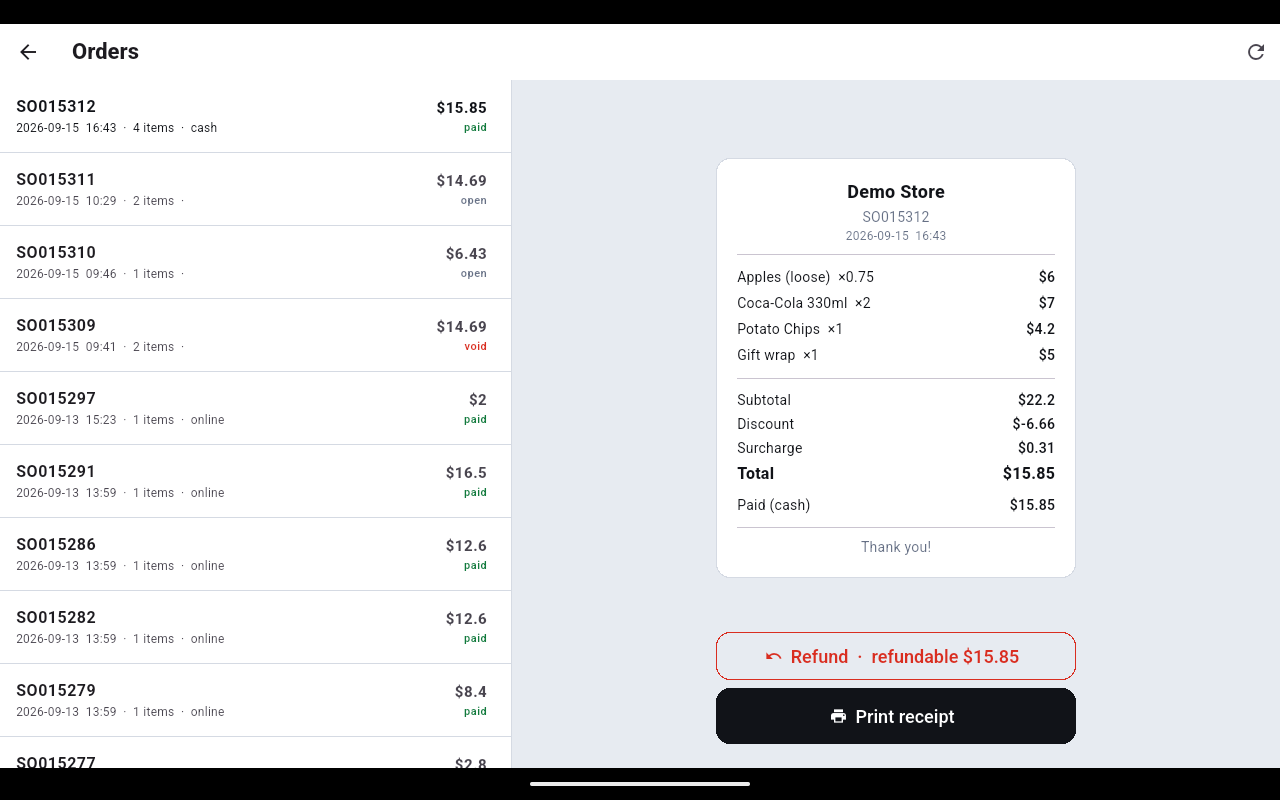
- Tap the Orders icon in the top bar.
- The list runs newest first. Each row shows the order number, date and time, item count, how it was paid, the total and the status — paid, open (a table still running), void or refunded.
- Tap a row. A copy of the receipt fills the right-hand side with the lines, subtotal, discount, surcharge, total and what was paid.
Refund
- Select the order and tap Refund.
- Set how much of each line is coming back with + and −. A weighed line is a single tick box — it comes back whole or not at all. The button at the bottom keeps a running Confirm refund amount.
- Choose Refund to: Cash or Card (original card).
- Have a manager key their Manager PIN. The button stays greyed out until a PIN is entered.
- Add a Reason (optional) and tap Confirm refund. A green message confirms the amount and the order's status changes to refunded.
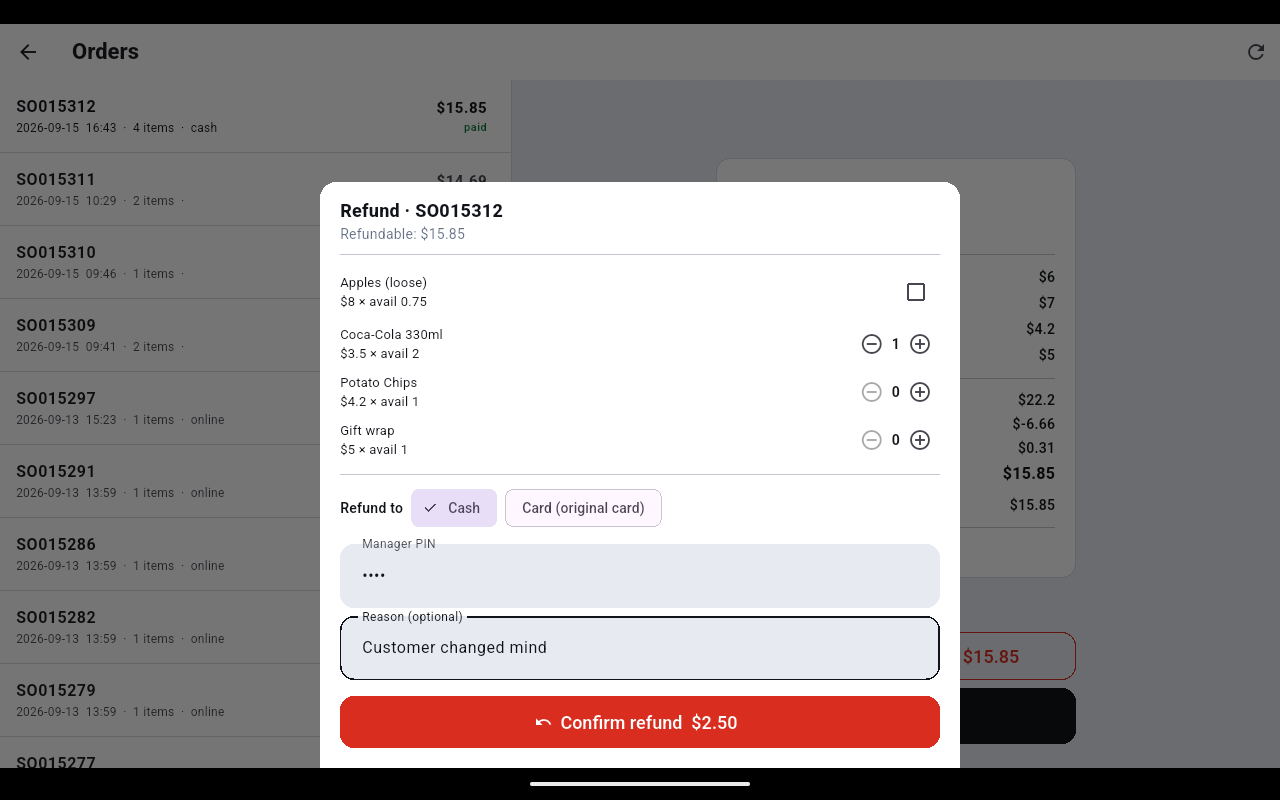
A wrong PIN gives Incorrect manager PIN or insufficient permission and nothing is refunded. Only staff with a manager or owner role can approve a refund — set them up under ⋮ → Staff clock.