Connecting payment accounts and devices
Owner task, done once. System settings separates connecting an account from offering it as a payment method, and you must do them in that order.
Bind the accounts
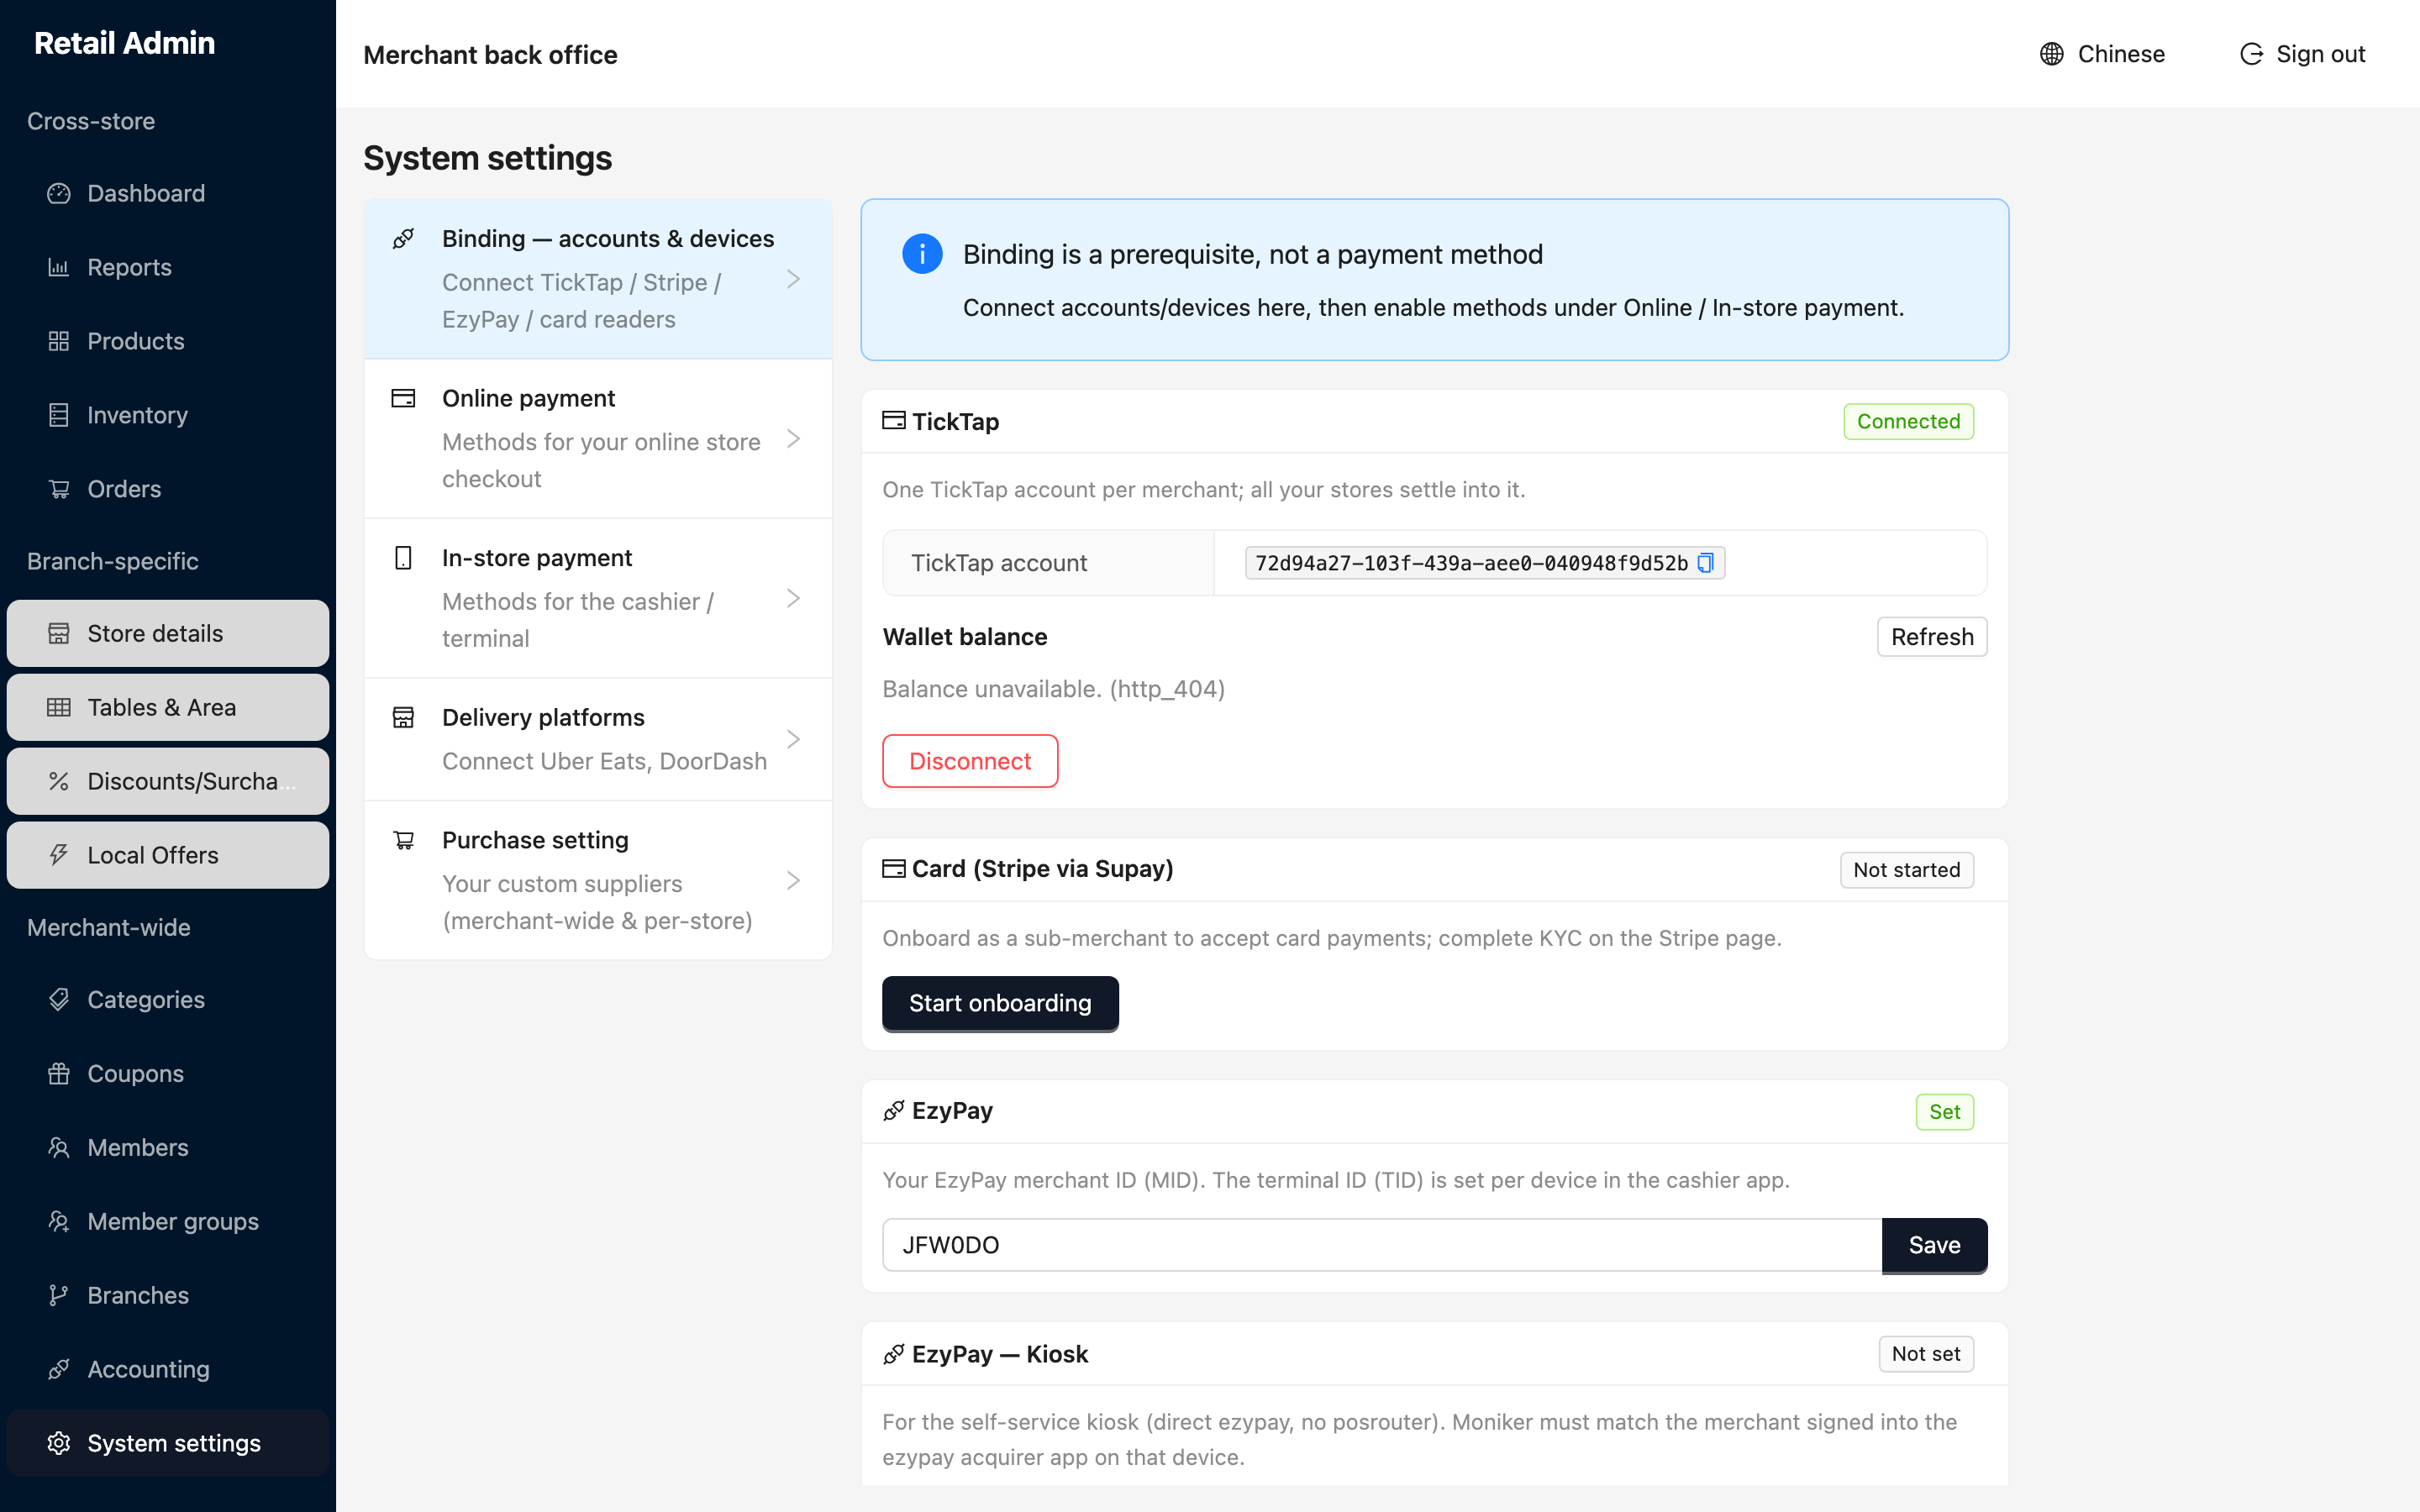
- Click System settings, then Binding — accounts & devices in the left column.
- On the TickTap card, the badge reads Connected once your wallet is linked and the account identifier is shown. Refresh re-reads the wallet balance; Disconnect unlinks it.
- On Card (Stripe via Supay), click Start onboarding and finish the identity checks on the Stripe page. The badge stays Not started until you do.
- On EzyPay, type your EzyPay merchant ID and click Save. The badge changes to Set.
- Fill in EzyPay — Kiosk only if you run a self-service kiosk, then click its Save.
Turn the methods on
- Open Online payment and switch on what your e-shop checkout should offer — Card (Stripe) and TickTap QR.
- Open In-store payment and switch on what the cashier should see — Card reader (Supay), EzyPay and TickTap QR.
- With EzyPay on, tick which terminal methods appear at checkout: Card, EFTPOS, WeChat / Alipay, UnionPay.
A method you have not bound yet cannot be switched on. Its toggle stays grey with the orange line Complete Stripe onboarding first (Binding). underneath.
Delivery platforms
- Open Delivery platforms. Uber Eats and DoorDash each show a Not connected badge until you link them.
- Enter the Store ID and API Key the platform issued you and click Connect. Once connected, that platform's orders arrive in your back office.