Setting up your branches
Owner task. Every product, price, stock figure and table plan belongs to a branch, so create your branches before you load any data.
Read the branch list
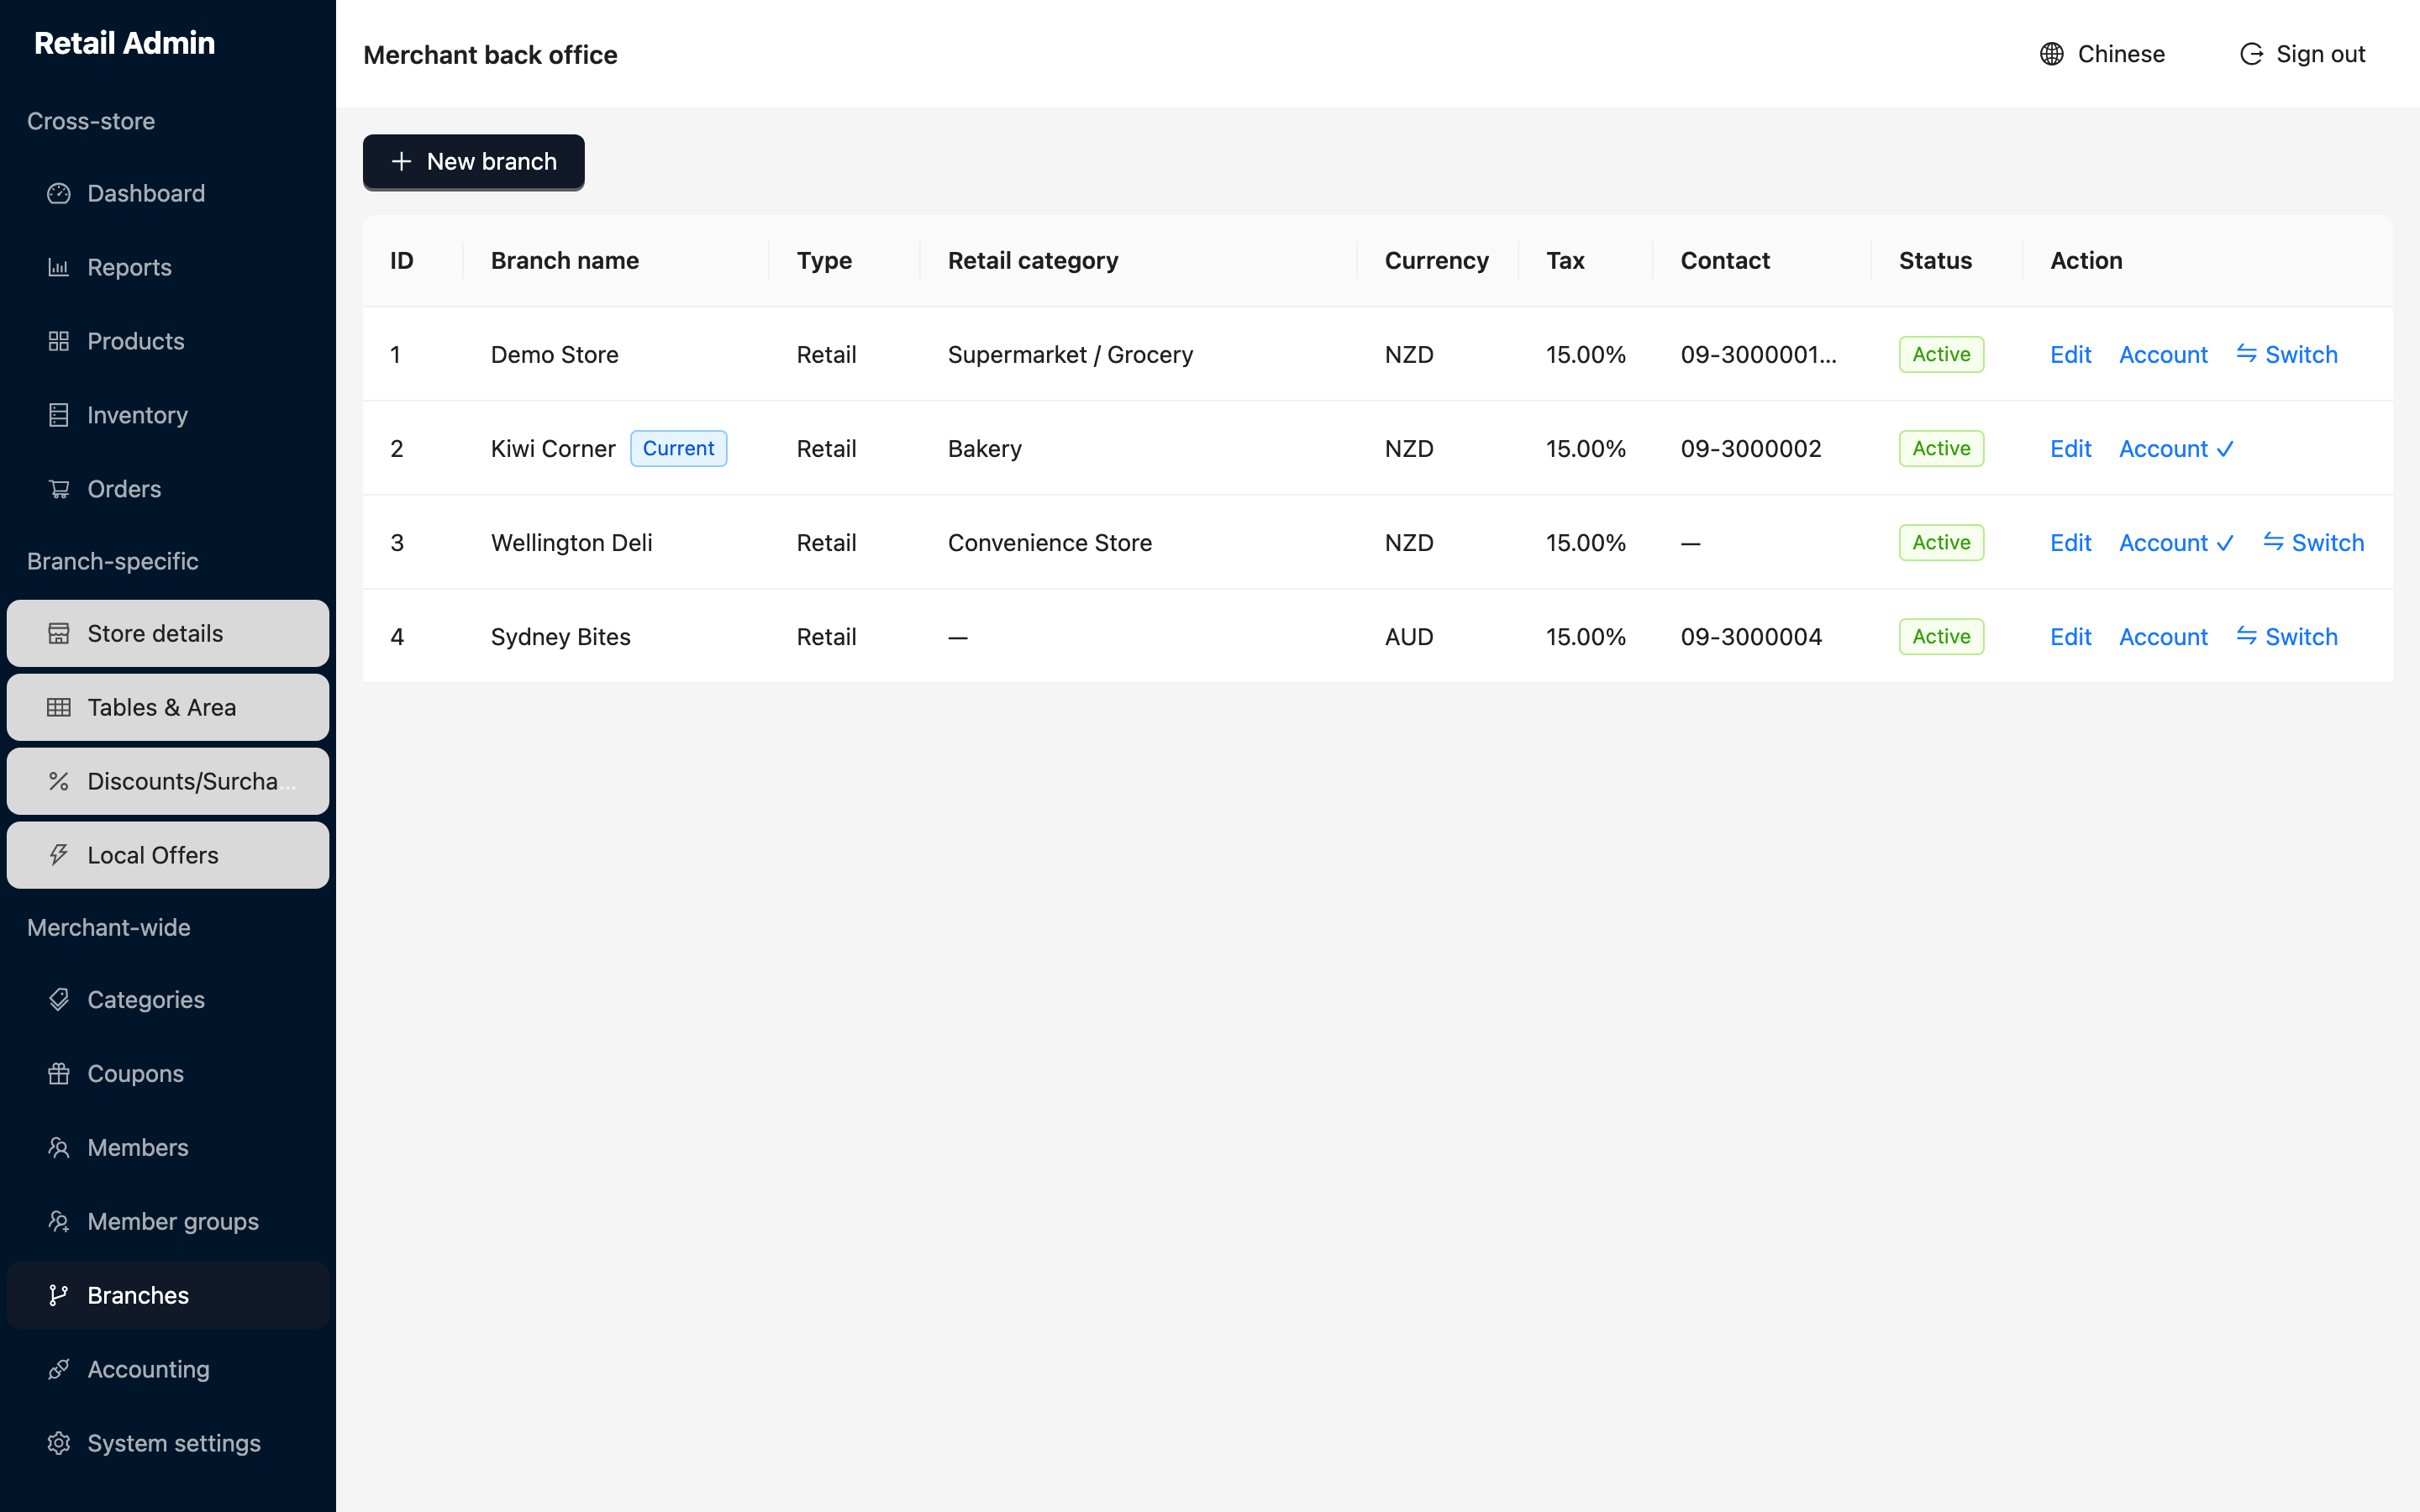
- Click Branches in the sidebar. The table lists every branch with its currency, tax rate, contact number and status.
- Find the row tagged Current — that is the branch the branch-specific pages are showing you right now.
Add a branch
- Click New branch. The New branch dialog opens.
- Enter the Branch name — this is the name staff and reports will see.
- Set Type to Retail or Hospitality. Hospitality is the setting for table service.
- Pick a Retail category (Bakery, Convenience Store, Supermarket / Grocery and so on). It can be left empty.
- Check Currency (three-letter code), Tax rate (0-1) — enter
0.15for 15% GST — and Timezone. - Fill in Contact number and Address, leave Status on Active, and click OK. The new branch appears in the table.
Move between branches
- Click Switch on the branch you want to work in. The page reloads and that branch now carries the Current tag.
- On a branch-specific page you can also use the small picker next to the page title — it does the same thing without coming back here.
Switching branches changes what every branch-specific page writes to. Check the branch name beside the page title before you edit tables, discounts or store details.