Importing a product file
The fastest way to load a catalogue from another POS or a spreadsheet. You do not have to reformat the file first.
- Go to Products and pick the branch you are importing into. With All shops still selected the import button warns you to choose a branch first.
- Click Import CSV / Excel. Use Download template if you would rather start from a blank sheet.
- Click or drag your file into the upload box. CSV and Excel (.xlsx/.xls) are both accepted, and the encoding and separator are detected for you.
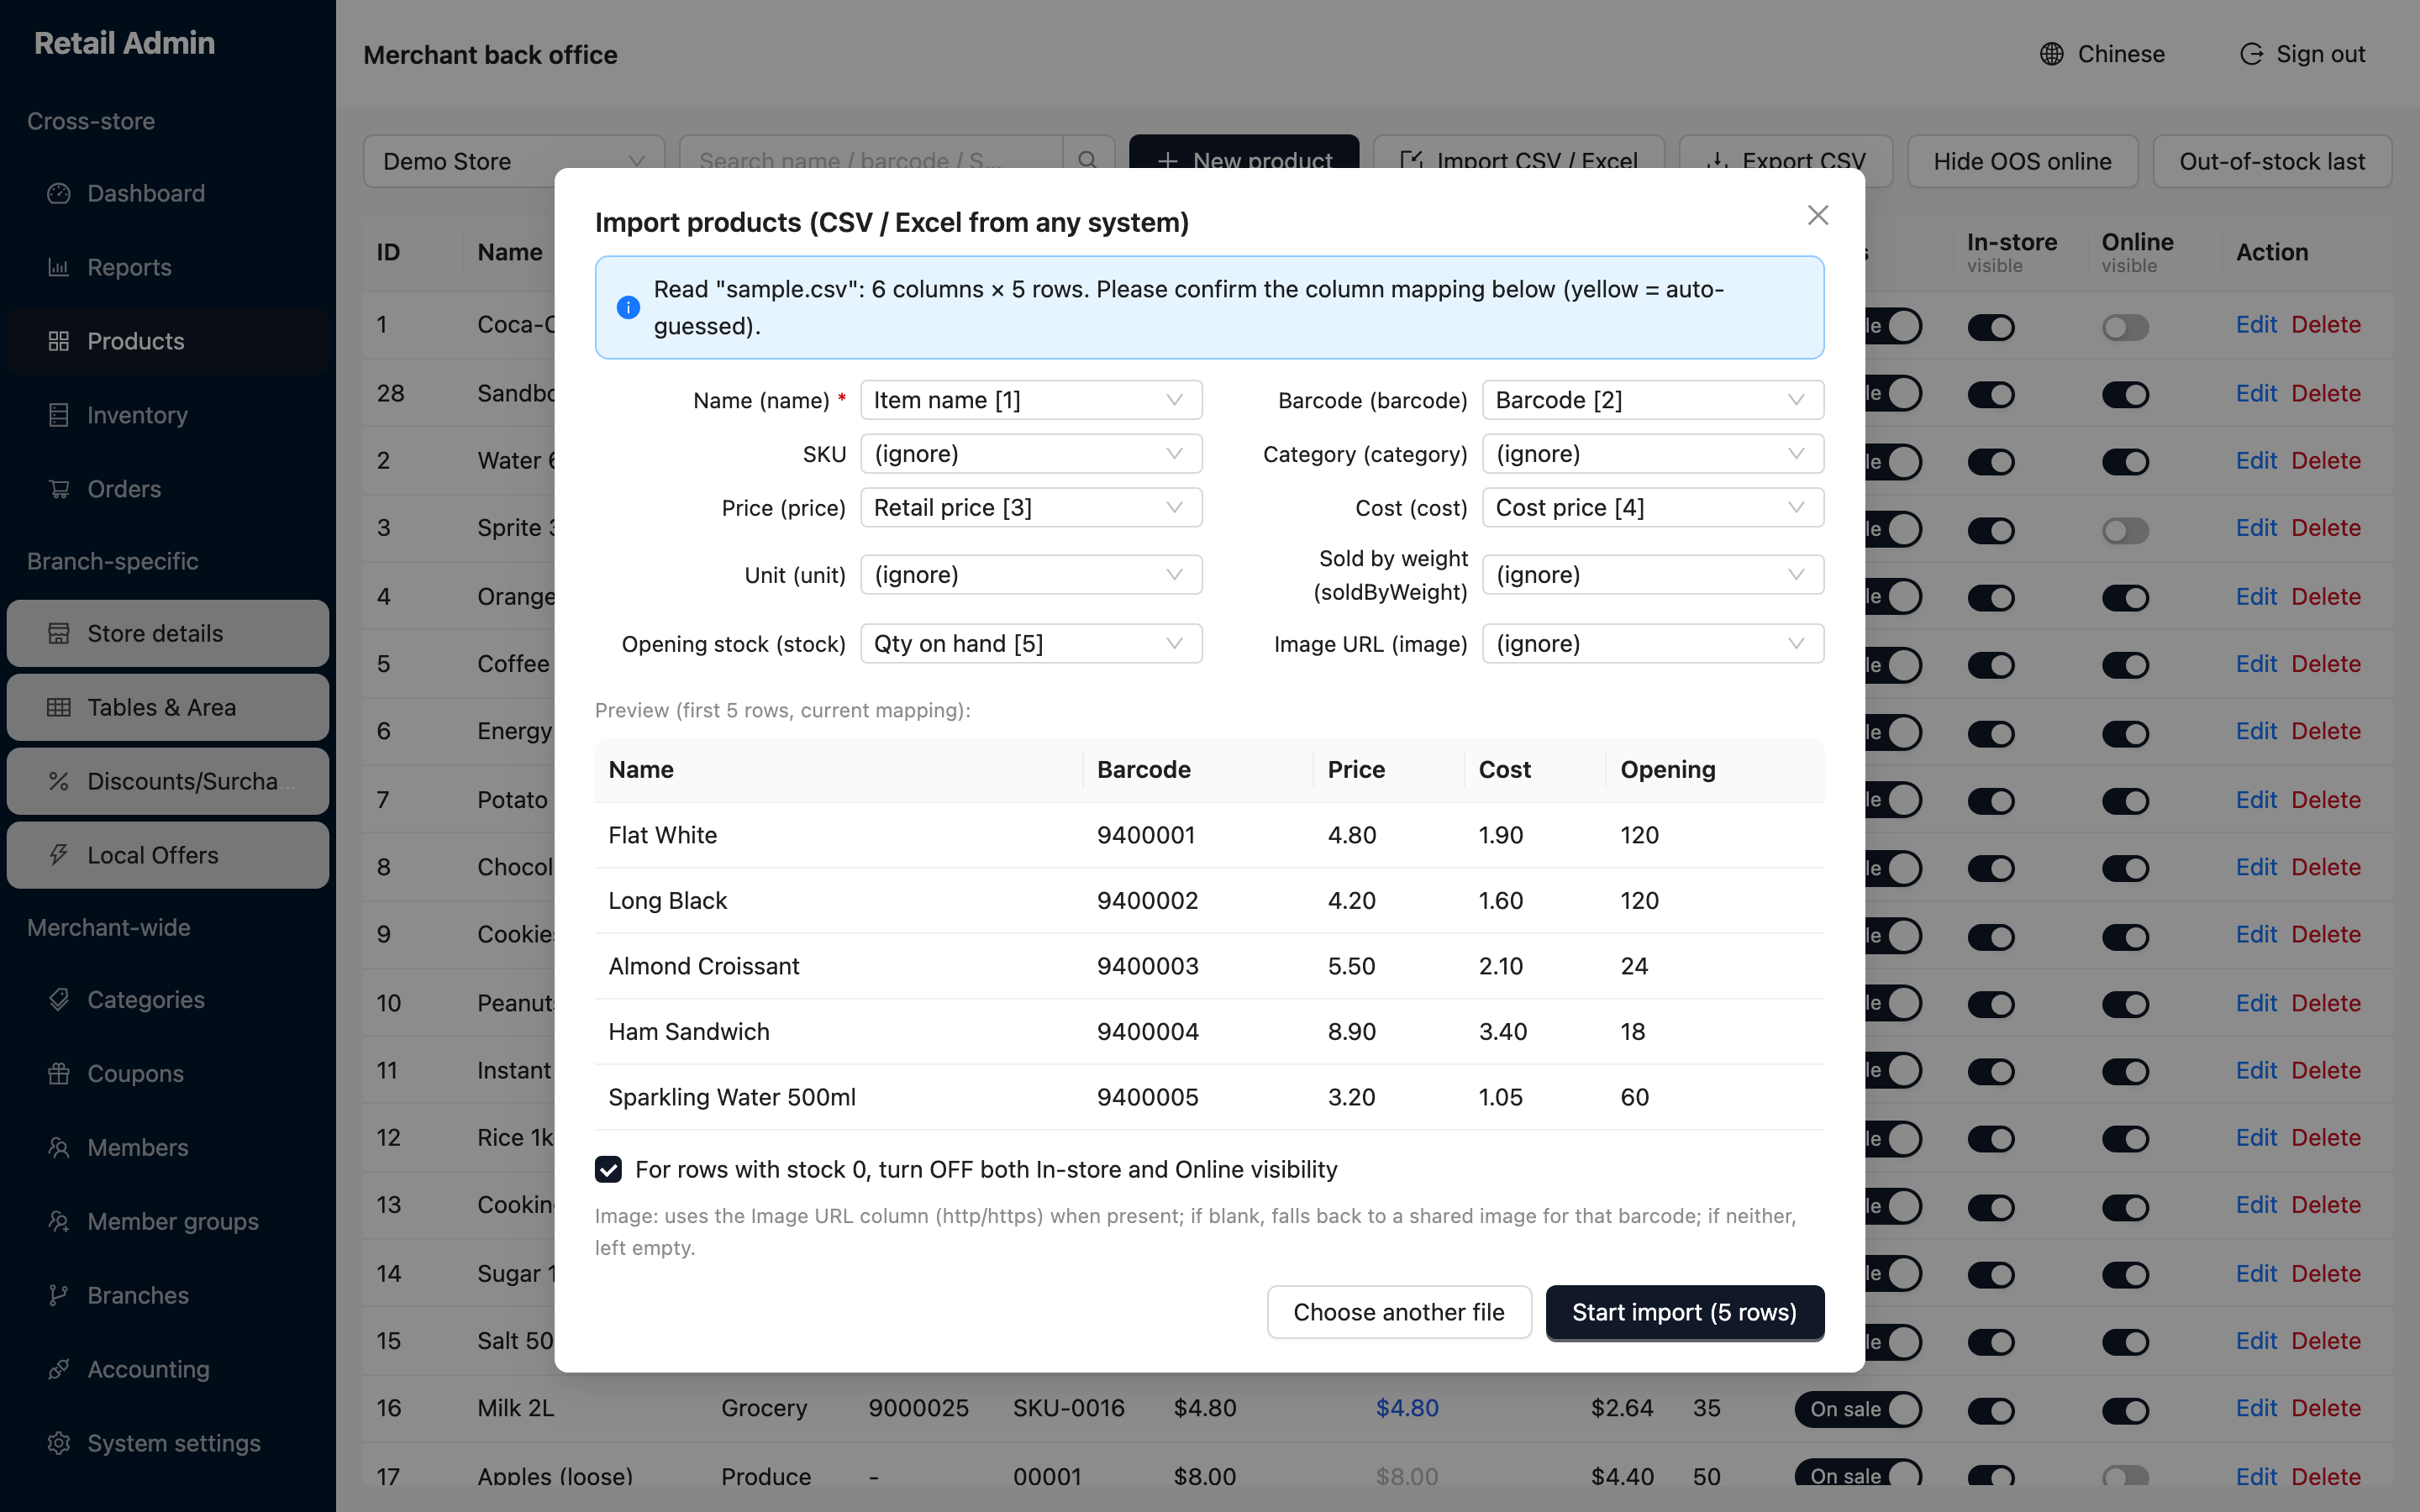
- The dialog reads the file, reports how many columns and rows it found, and guesses which of your columns maps to Name, Barcode, SKU, Category, Price, Cost, Unit, Sold by weight, Opening stock and Image URL.
- Correct any wrong guess from its dropdown, or set it to (ignore). Name is the one mapping you must provide.
- Check the preview of the first five rows — it is your file read through the current mapping.
- Leave the checkbox ticked to turn both visibility switches off for rows whose stock is 0, so empty lines do not go live.
- Click Start import. The button names the row count it is about to load. Choose another file takes you back a step.
Import writes into the branch selected on the Products page behind the dialog. Check that branch name before you upload — there is no undo for a bulk import.