Products
The product list is where you set prices, control what appears in store and online, and keep the catalogue tidy. Products belong to one branch.
Find a product
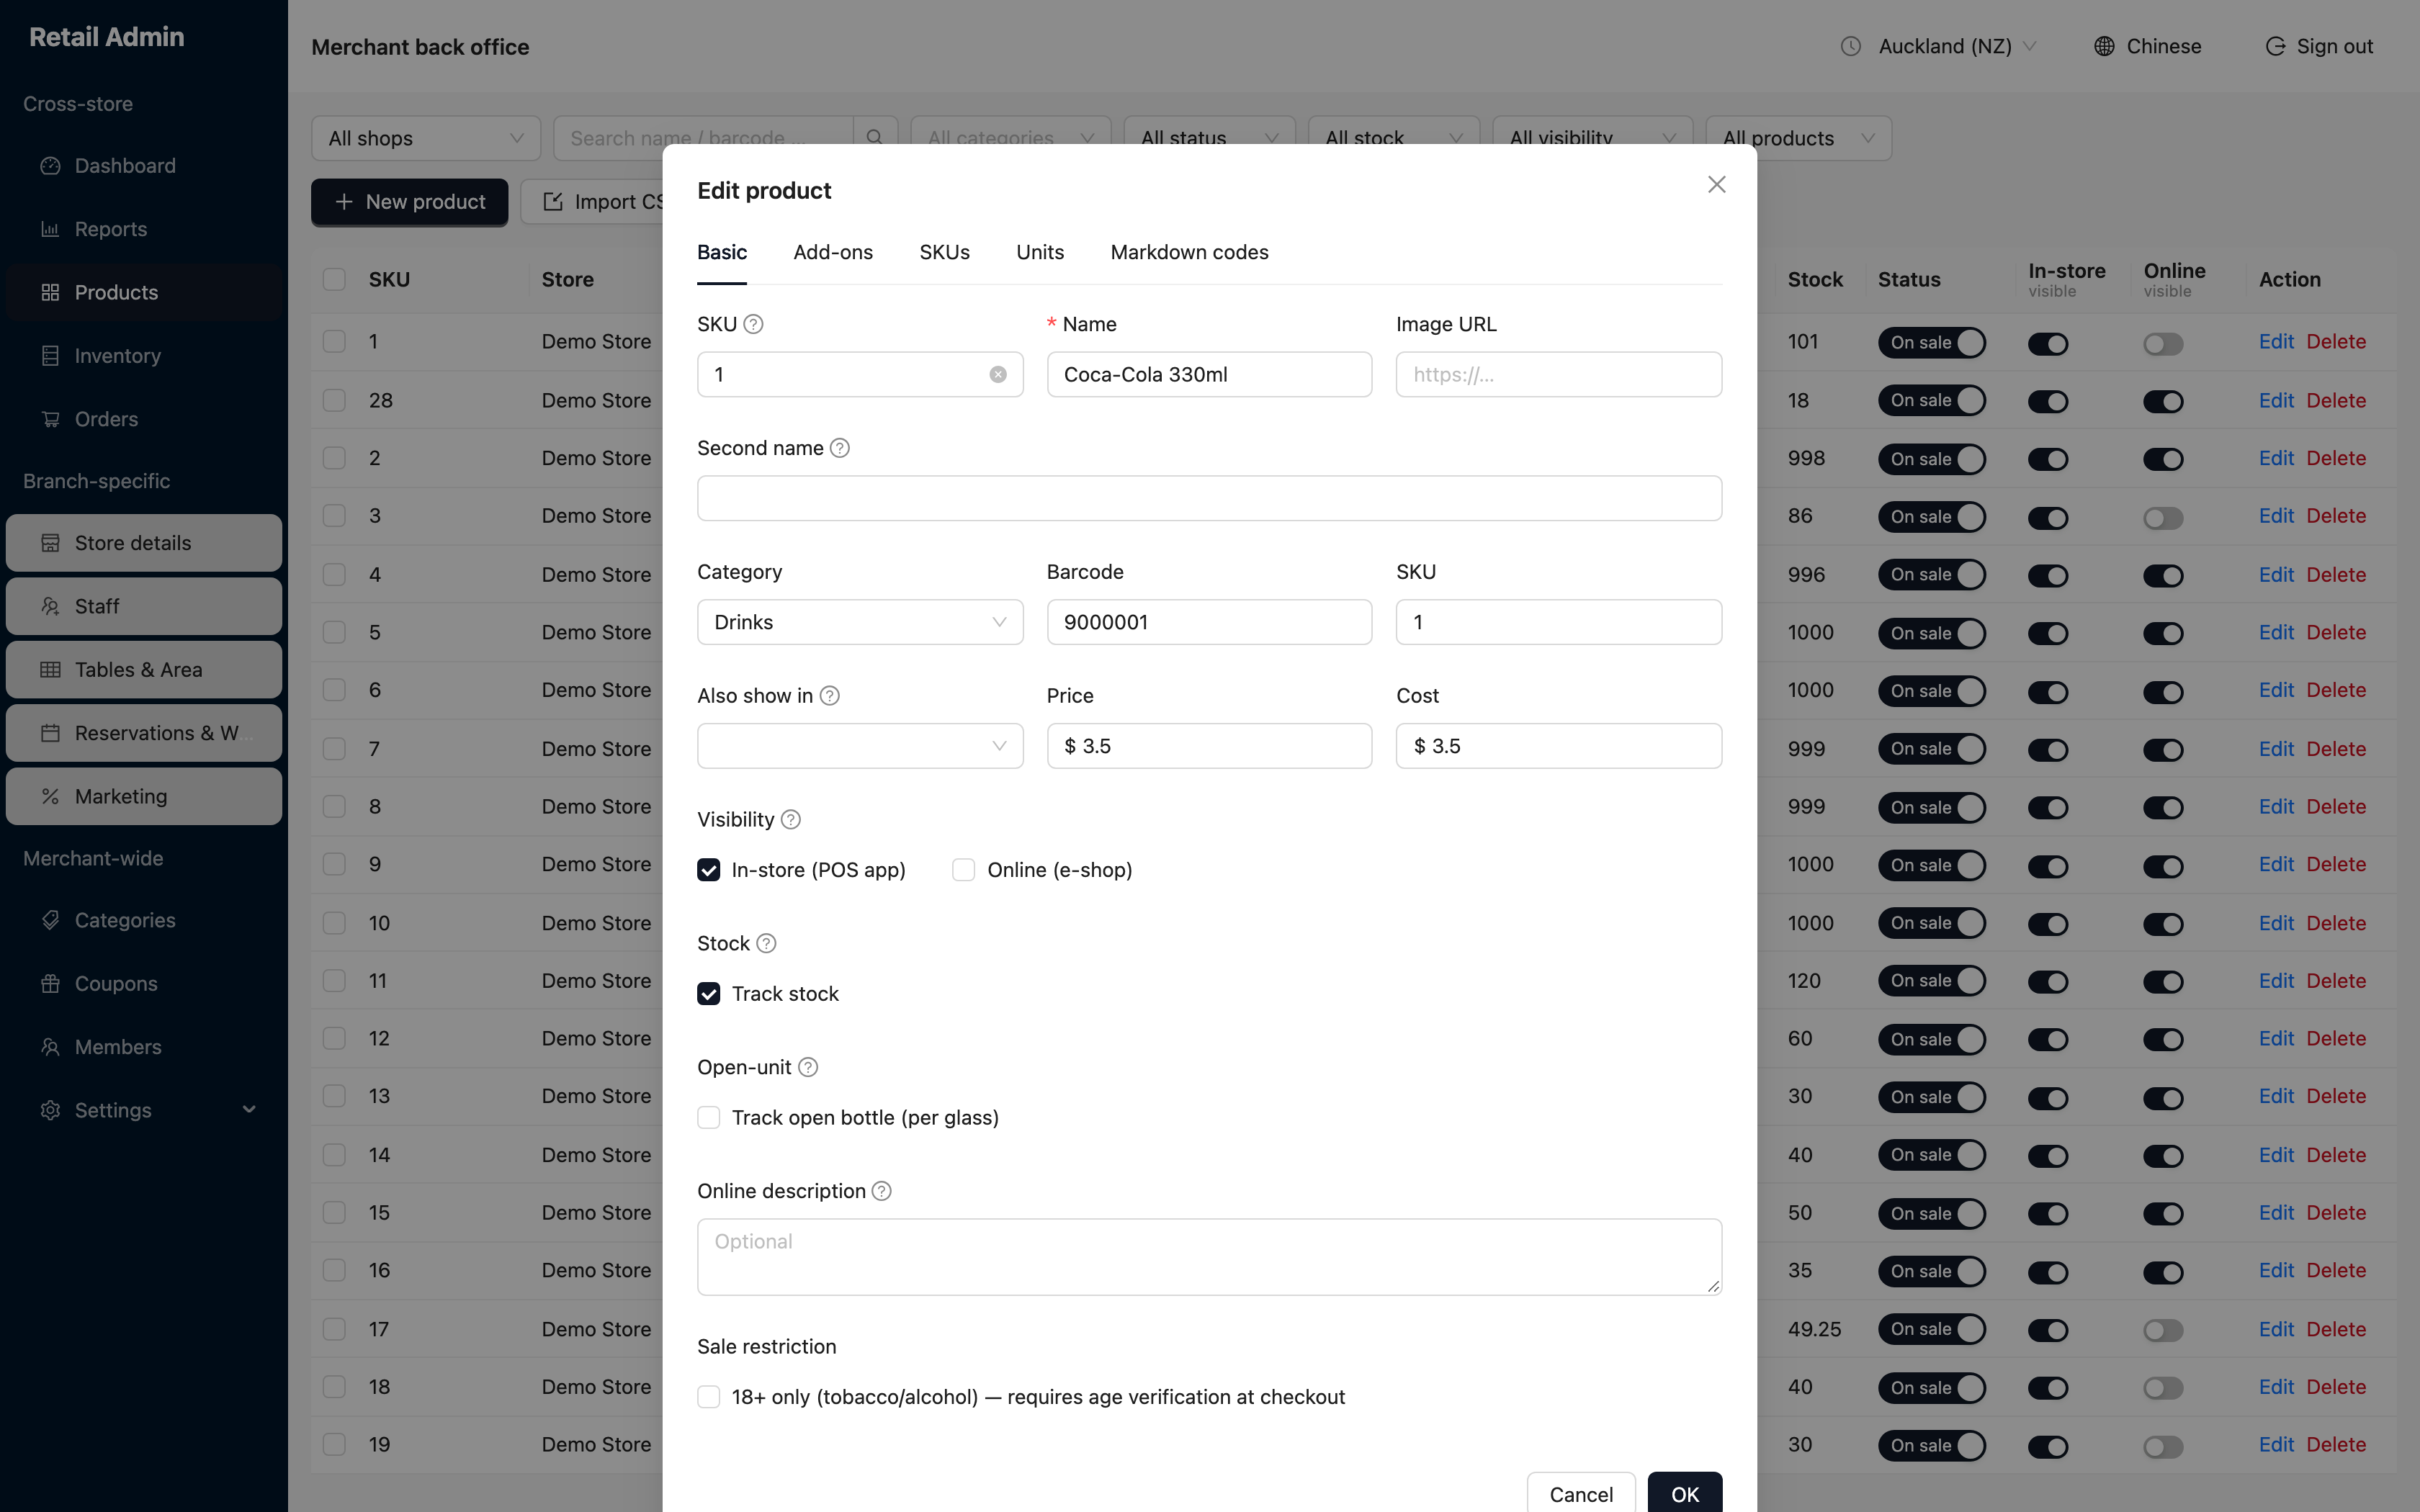
- Click Products. Owners start on All shops, which adds a Store column so you can see which branch each row belongs to.
- Pick a branch from the dropdown to narrow the list, or type into Search name / barcode / SKU and press Enter.
- Click Out-of-stock last to push items with no stock to the bottom of the list.
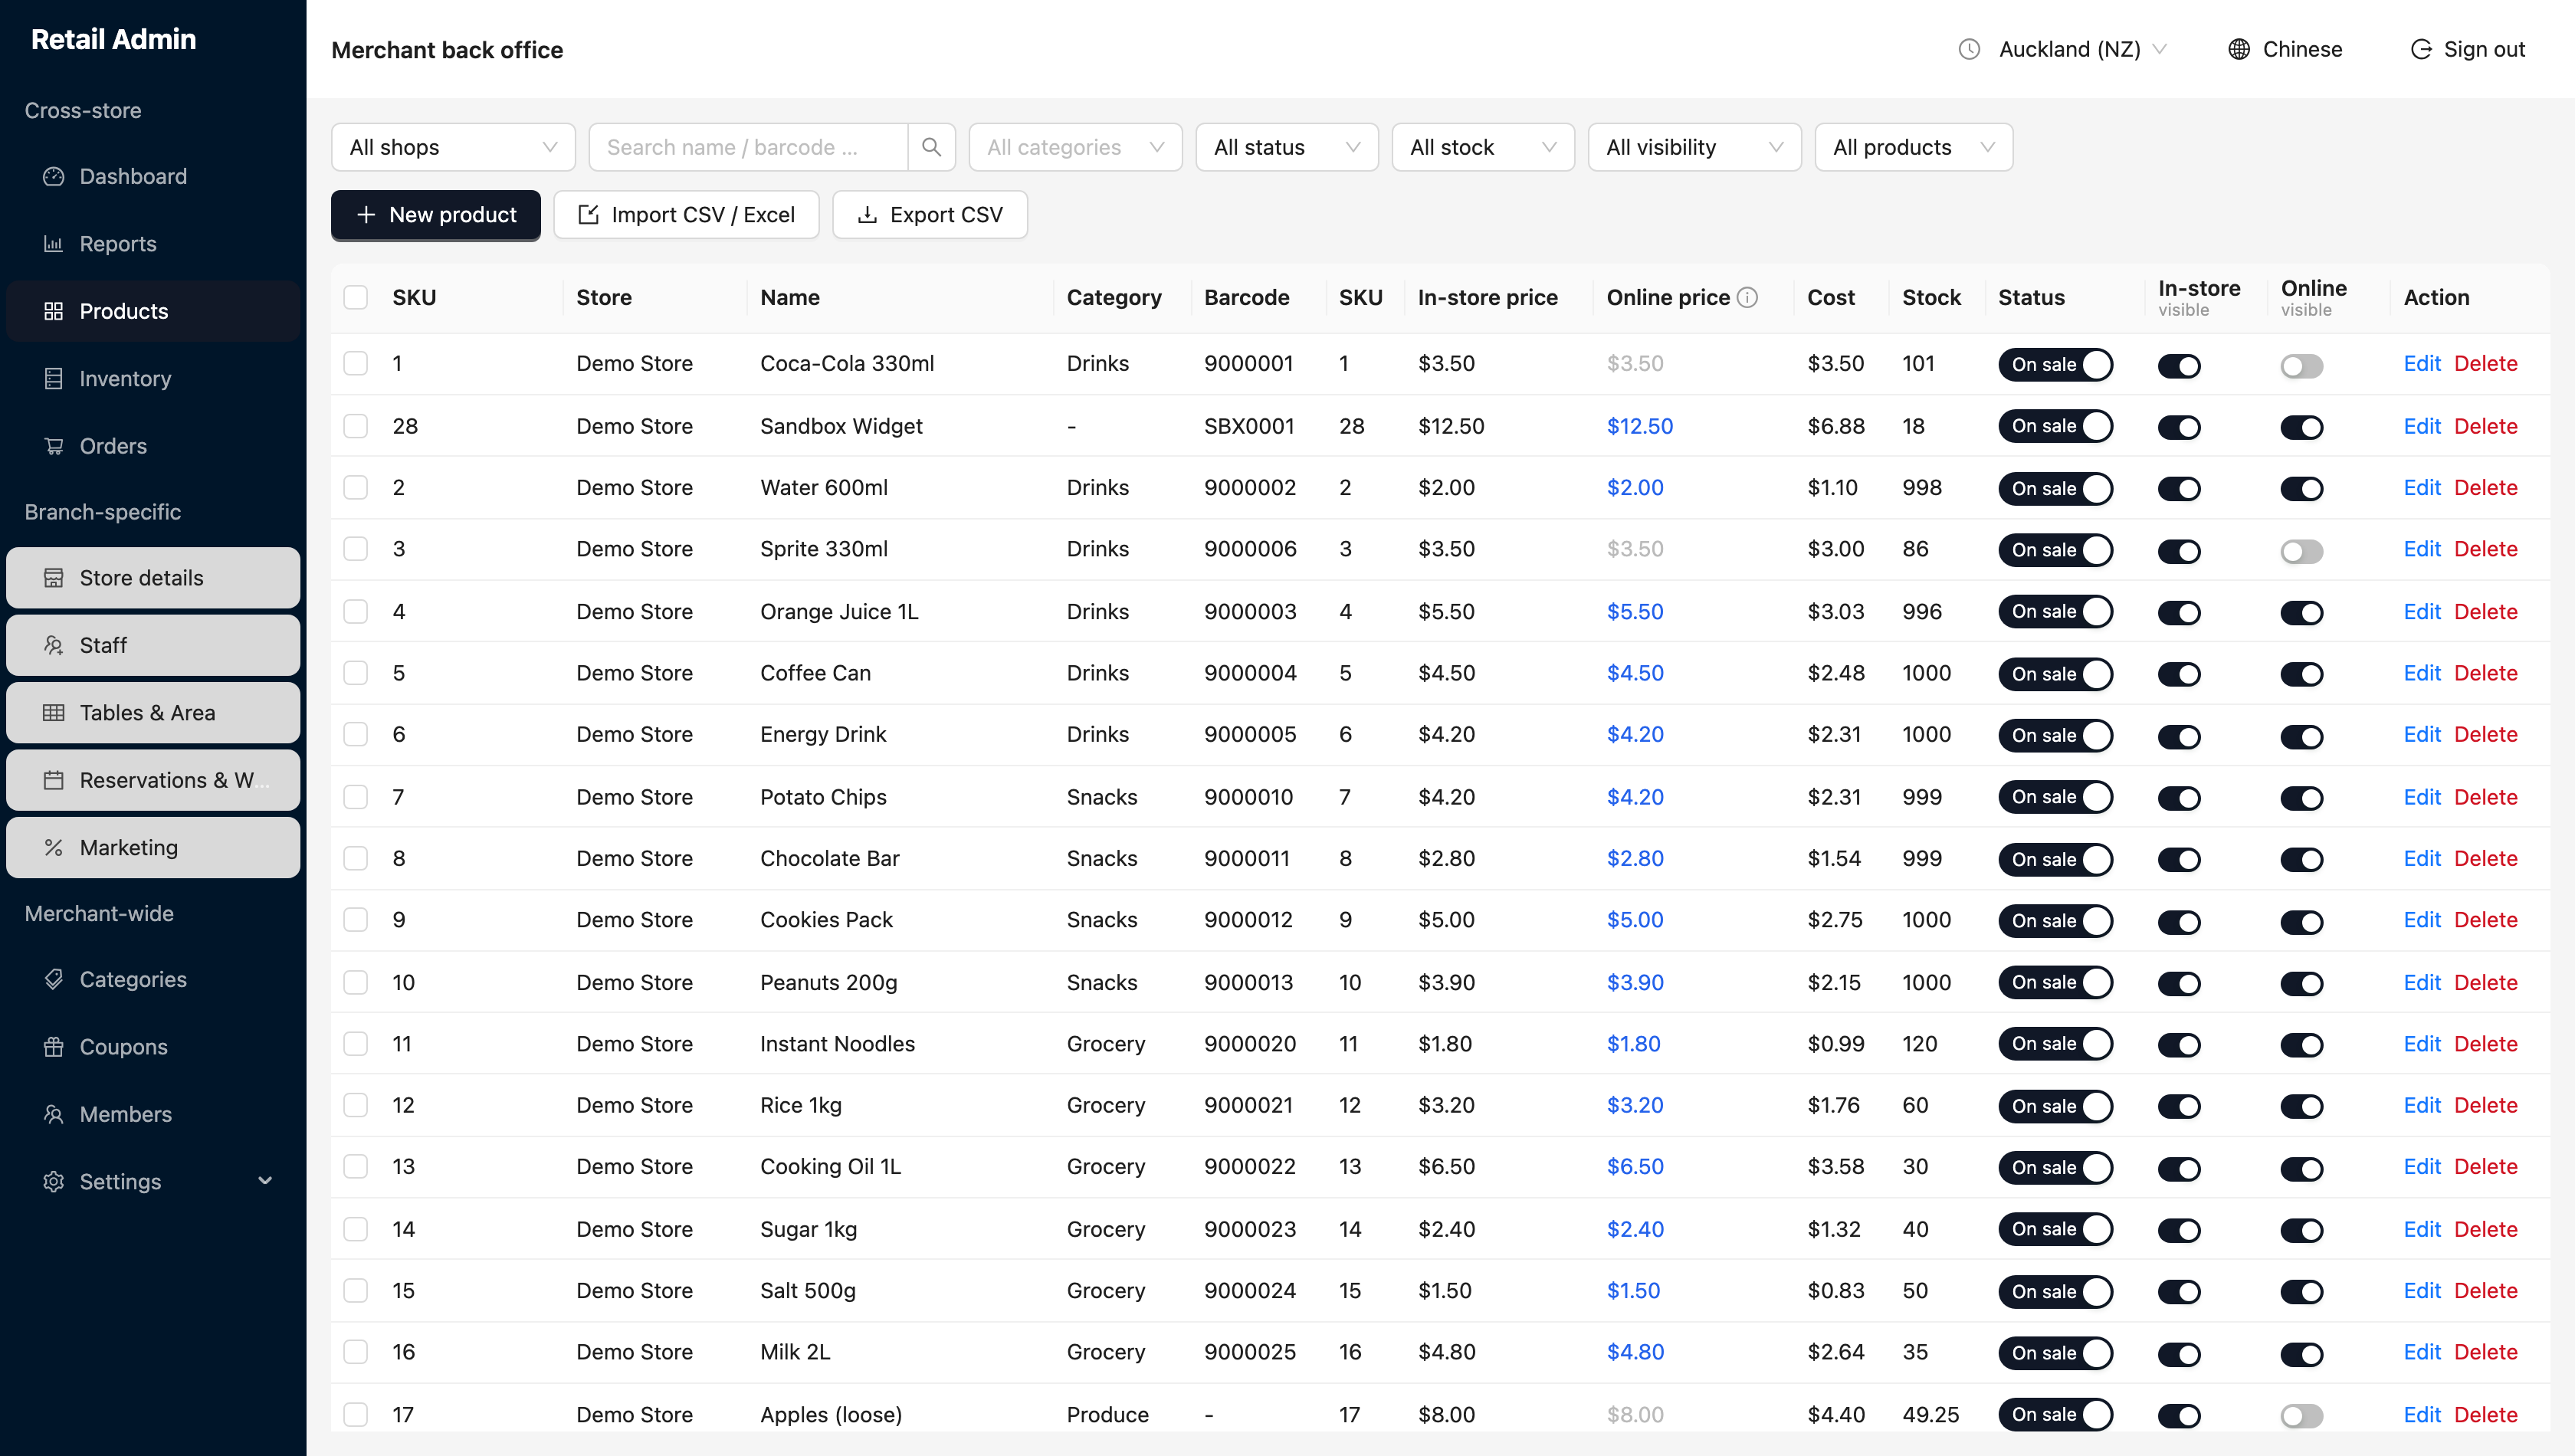
Create or edit a product — the Basic tab
The product dialog has five tabs across the top — Basic, Add-ons, SKUs, Units and Markdown codes. You fill in the Basic tab; the other four are optional and covered below.
- Click New product, or Edit on a row. On a new product you must pick the Branch first; on an existing one the branch is shown but locked.
- Enter the Name (required), choose a Category, and paste an Image URL if you have one.
- Use Second name for a till-and-kitchen alias — a shorter name, a local-language name, or a kitchen abbreviation. It is optional, and where it prints is controlled in the receipt and kitchen settings.
- Fill in Barcode and SKU, then Price (what the customer pays in store) and Cost (what you paid, used for margin in reports).
- Use Also show in to list the product under extra categories as well as its main one — for example a wine that should appear under both Red wine and a Specials shelf.
- On a new product, set Opening stock. That field is not offered when editing — from then on stock is changed from the Inventory page.
- Under Visibility, tick In-store (POS app) to show it on the register and Online (e-shop) to publish it to your online store.
- Leave Track stock ticked for anything you count. Untick it for items that should never show as sold out and should not deduct stock when sold.
- Tick Track open bottle (per glass) only for a bottle you also sell by the glass. The stock then reads as whole bottles plus the open one's remaining measure, instead of dropping to a fraction. Leave it off for everything else.
- Add an Online description for the e-shop, and under Sale restriction tick 18+ only for tobacco or alcohol so the register asks for age verification.
- Click OK. The list refreshes with your change.
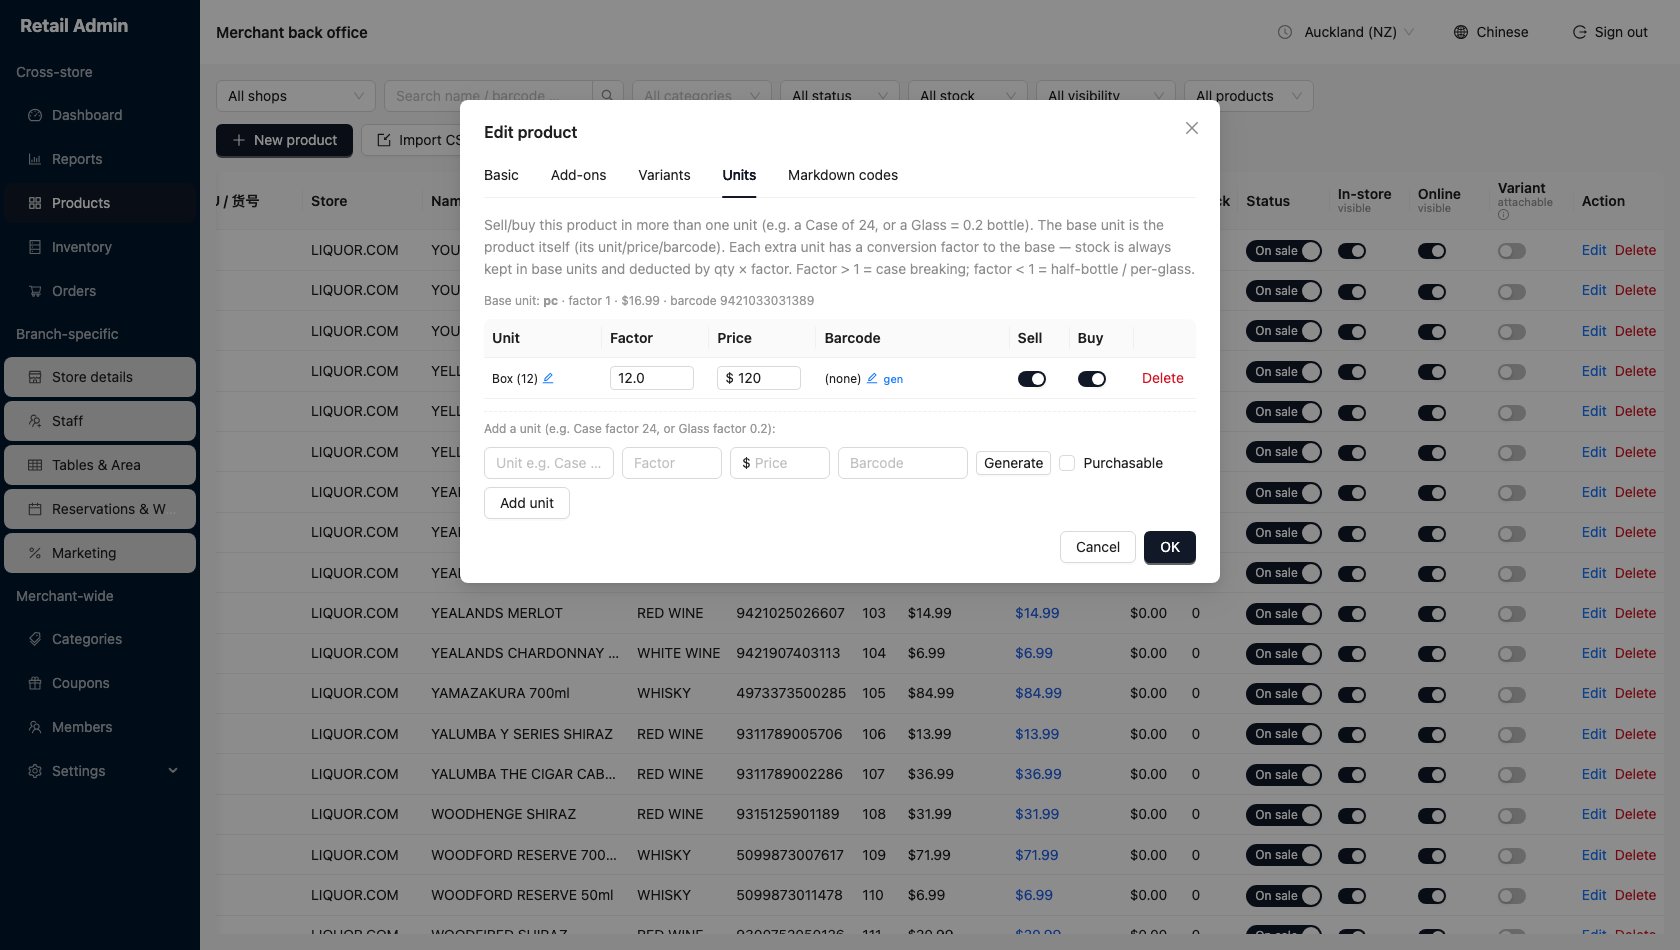
Units of measure — sell and buy by the case or the glass
By default a product is sold one base unit at a time (a bottle, a can, a piece). The Units tab lets you also sell or buy it in a larger or smaller unit — a Case of 12, a 6-pack, a Glass — while keeping a single shared stock count.
- Open Edit on a saved product and click the Units tab. The line at the top restates the base unit, its factor of 1, its price and its barcode.
- Under Add a unit, type a Unit name (e.g.
Case), its Factor — how many base units it equals (a case of 12 →12; a glass that is a fifth of a bottle →0.2) — and the Price for that whole unit. - Give the unit its own Barcode if it has one, or click Generate to mint an internal barcode you can print and stick on the case.
- Tick Purchasable if you receive stock in this unit. Click Add unit.
- In the list, each unit has a Sell switch (offer it at the register) and a Buy switch (offer it on purchase orders). The pencil edits a unit; Delete removes it.
- Click OK. Selling or receiving one of a unit now moves stock by quantity × factor base units — sell one Case of 12 and the count drops by 12.
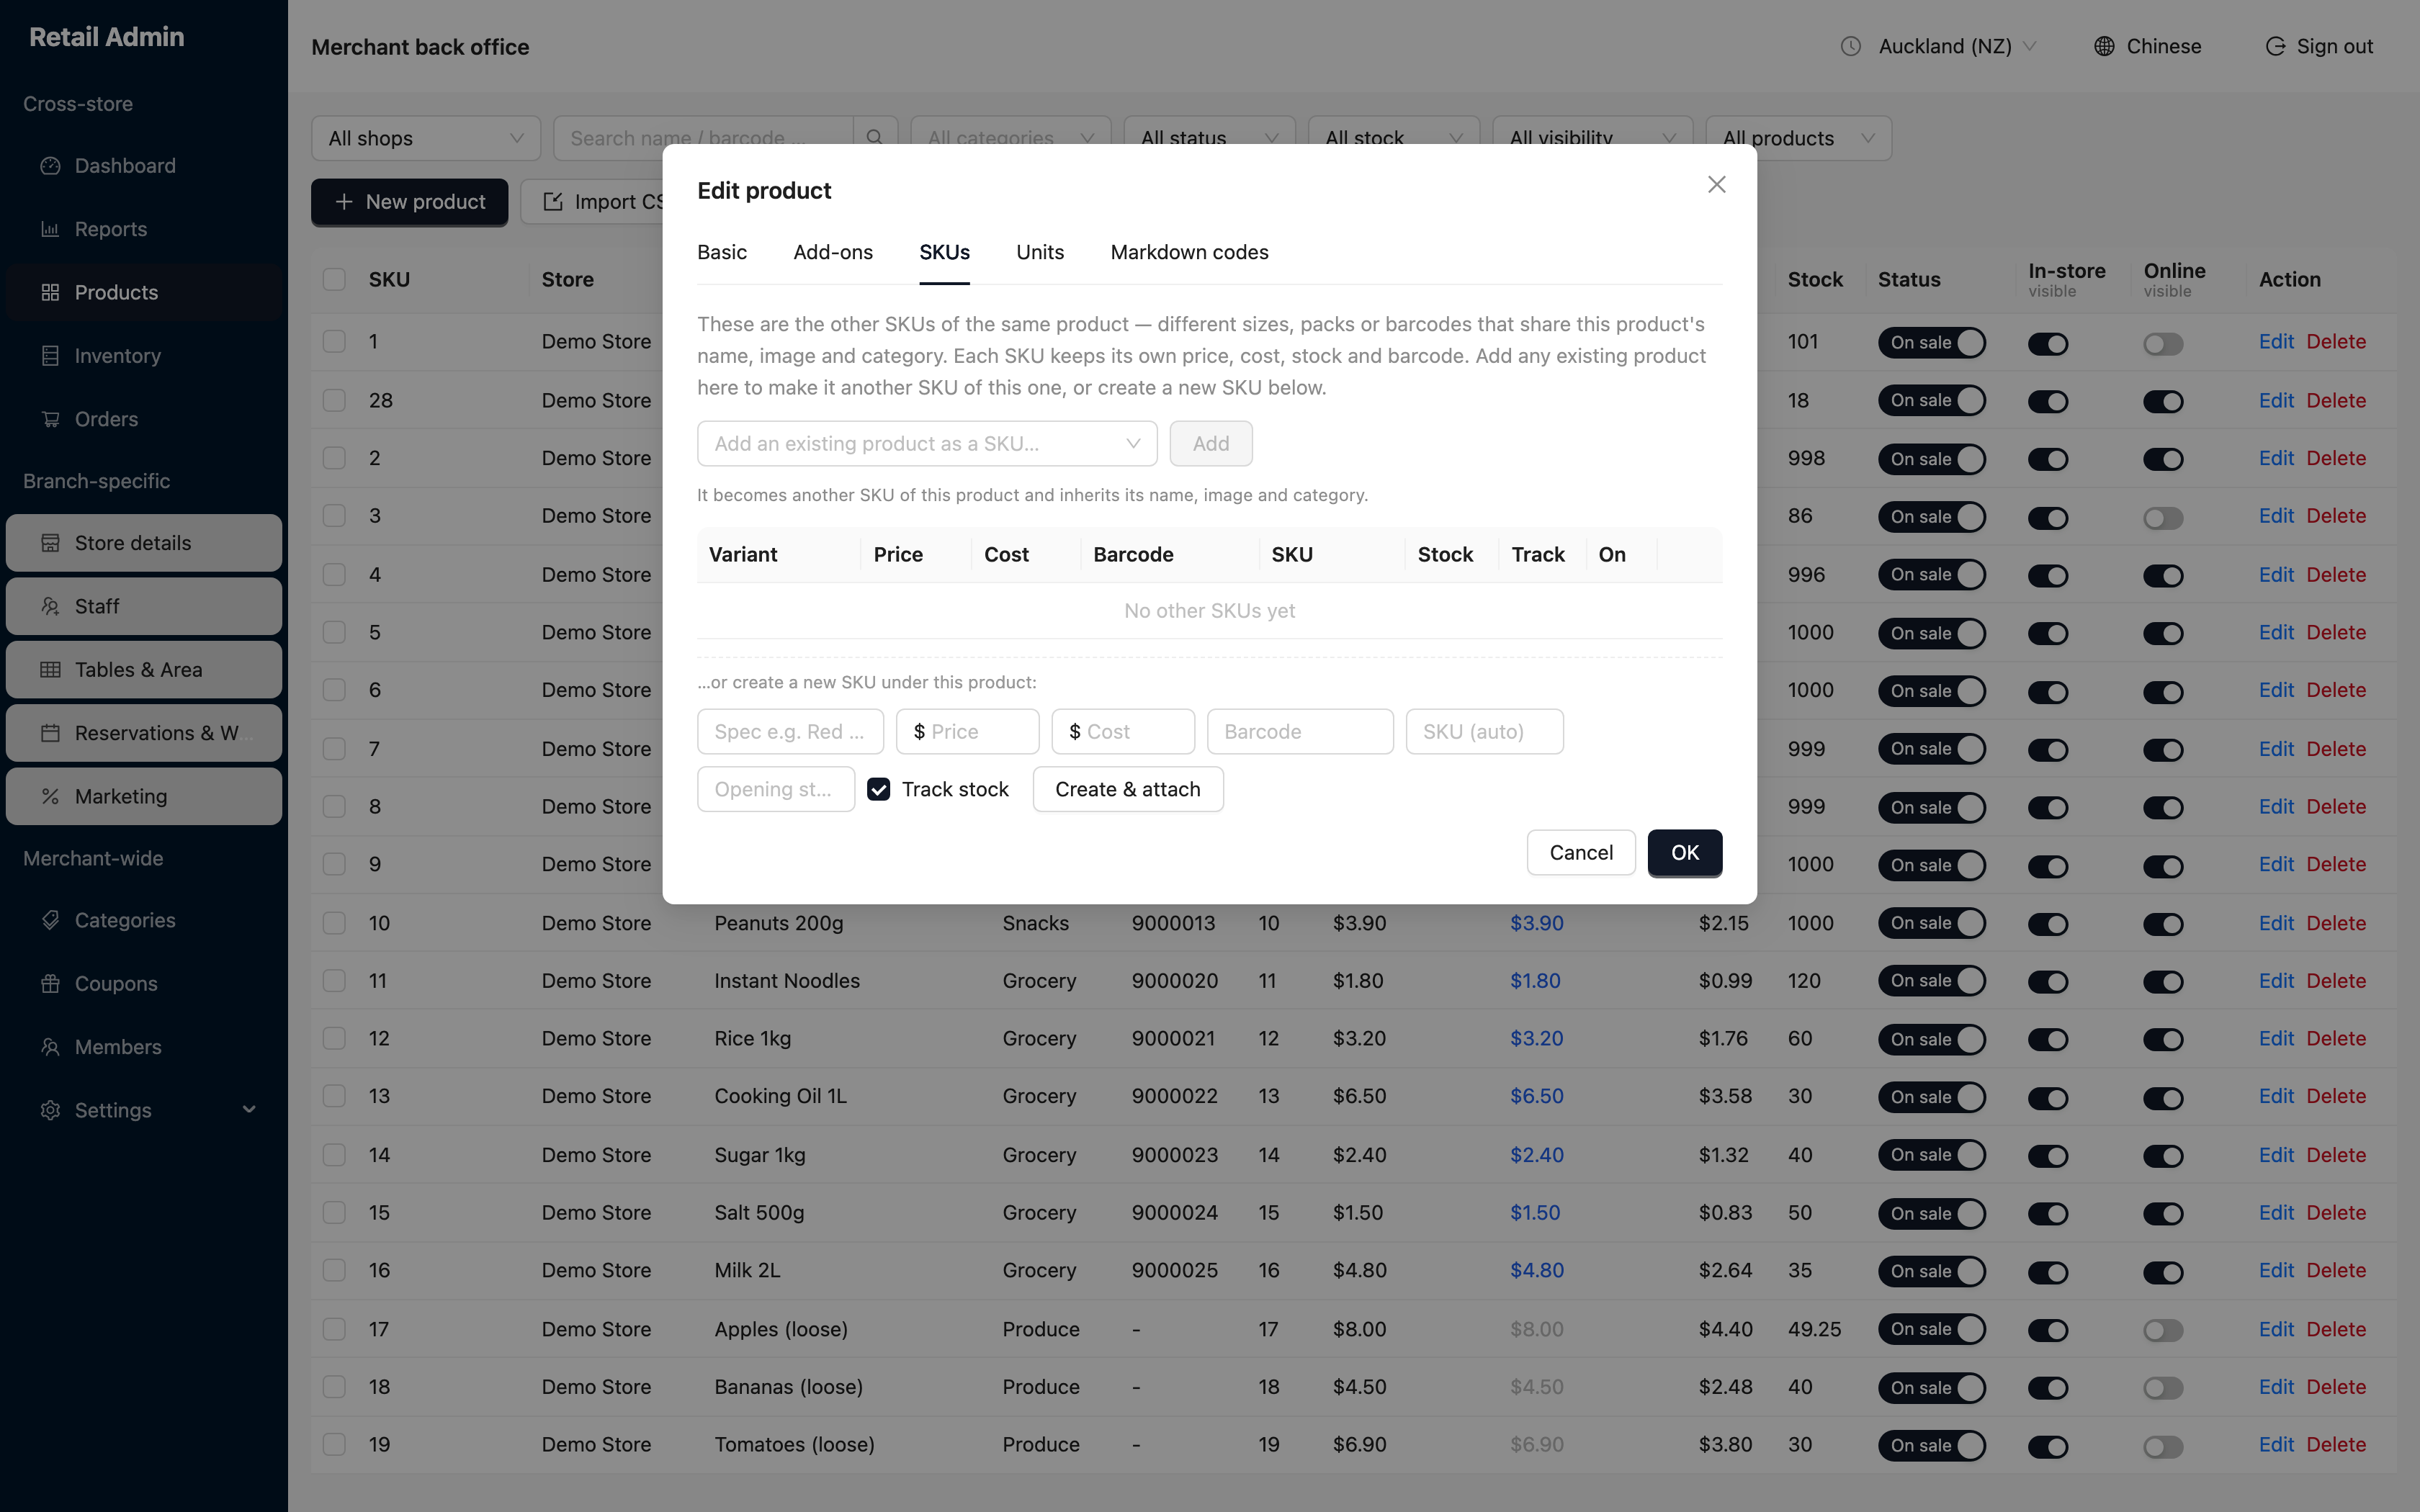
SKUs — one product, several sizes or packs
A product can carry several SKUs — different sizes, packs or barcodes that share its name, image and category. Each SKU keeps its own price, cost, stock and barcode, and the cashier picks between them at the register.
- Open Edit on the product and click the SKUs tab.
- To reuse a product you already have, pick it from Add an existing product as a SKU… and click Add. It becomes another SKU of this one and takes on its name, image and category.
- To make a new one, fill the …or create a new SKU under this product row — a Spec label (for example
Red / M / 500ml), Price, Cost, Barcode and opening stock — then click Create & attach. Leave SKU blank and it is filled in for you. - Each SKU is listed with its Variant spec, price, cost, stock and an On switch. Click OK. At the register the product prompts for which SKU, and the chosen SKU's own price applies.
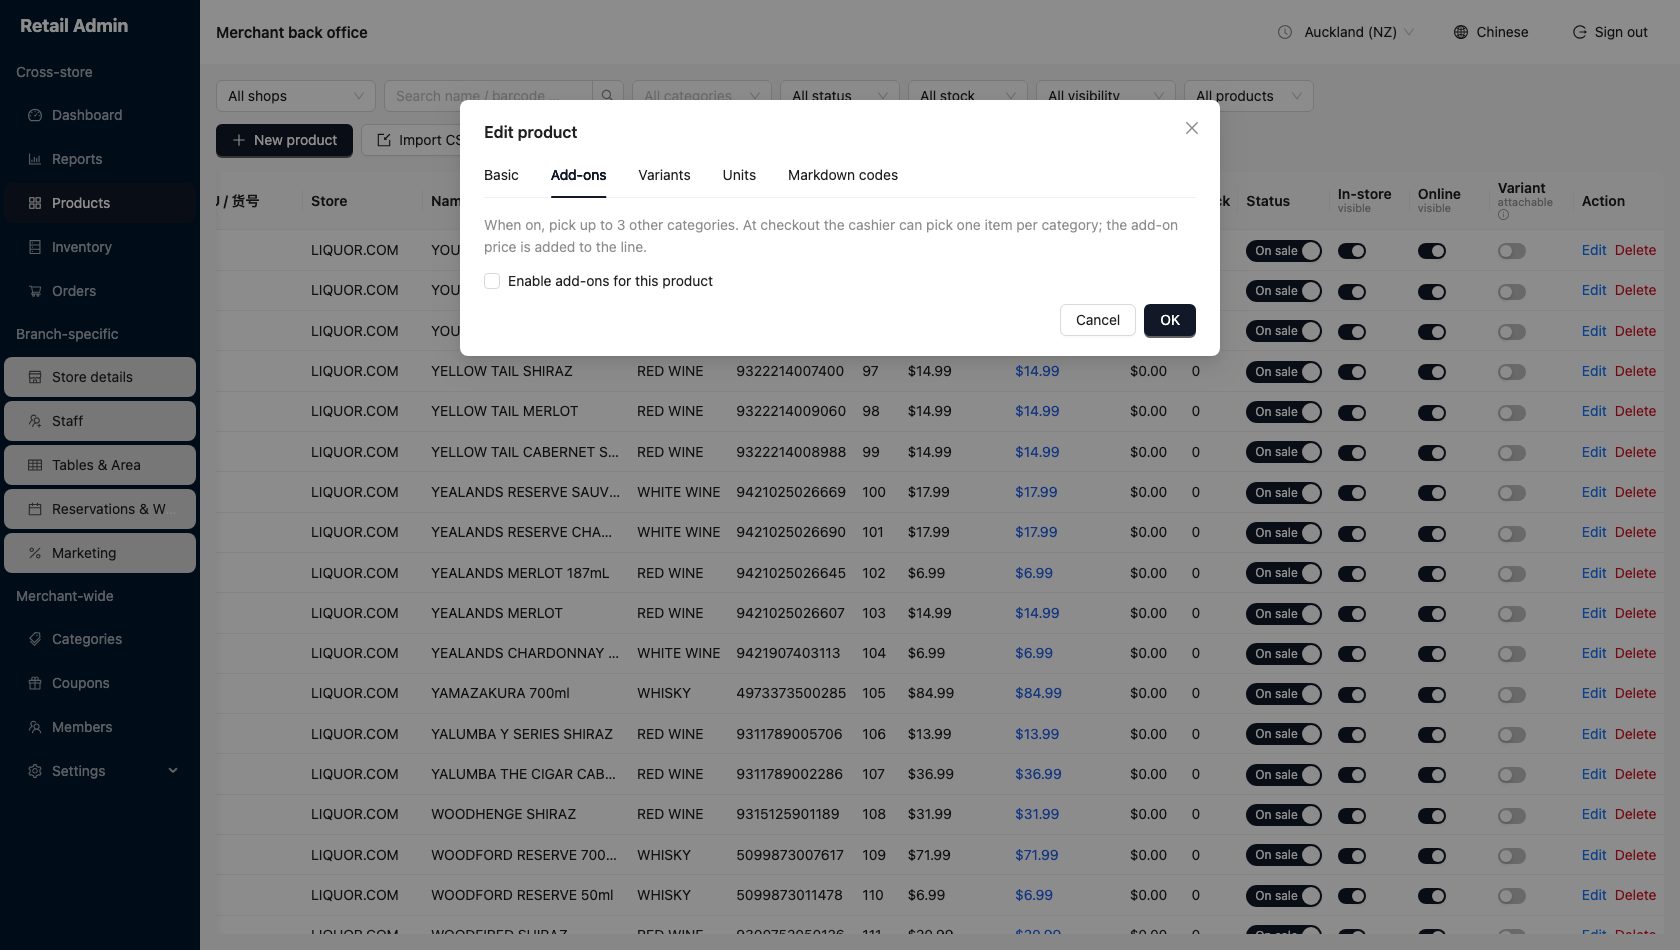
Add-ons — offer extras with an item
- Open Edit and click the Add-ons tab.
- Tick Enable add-ons for this product, then pick up to three categories the extras come from.
- Click OK. At the register, selling this item offers those categories so the cashier can add extras; each extra's price is added to the line.
Discount codes for a single item
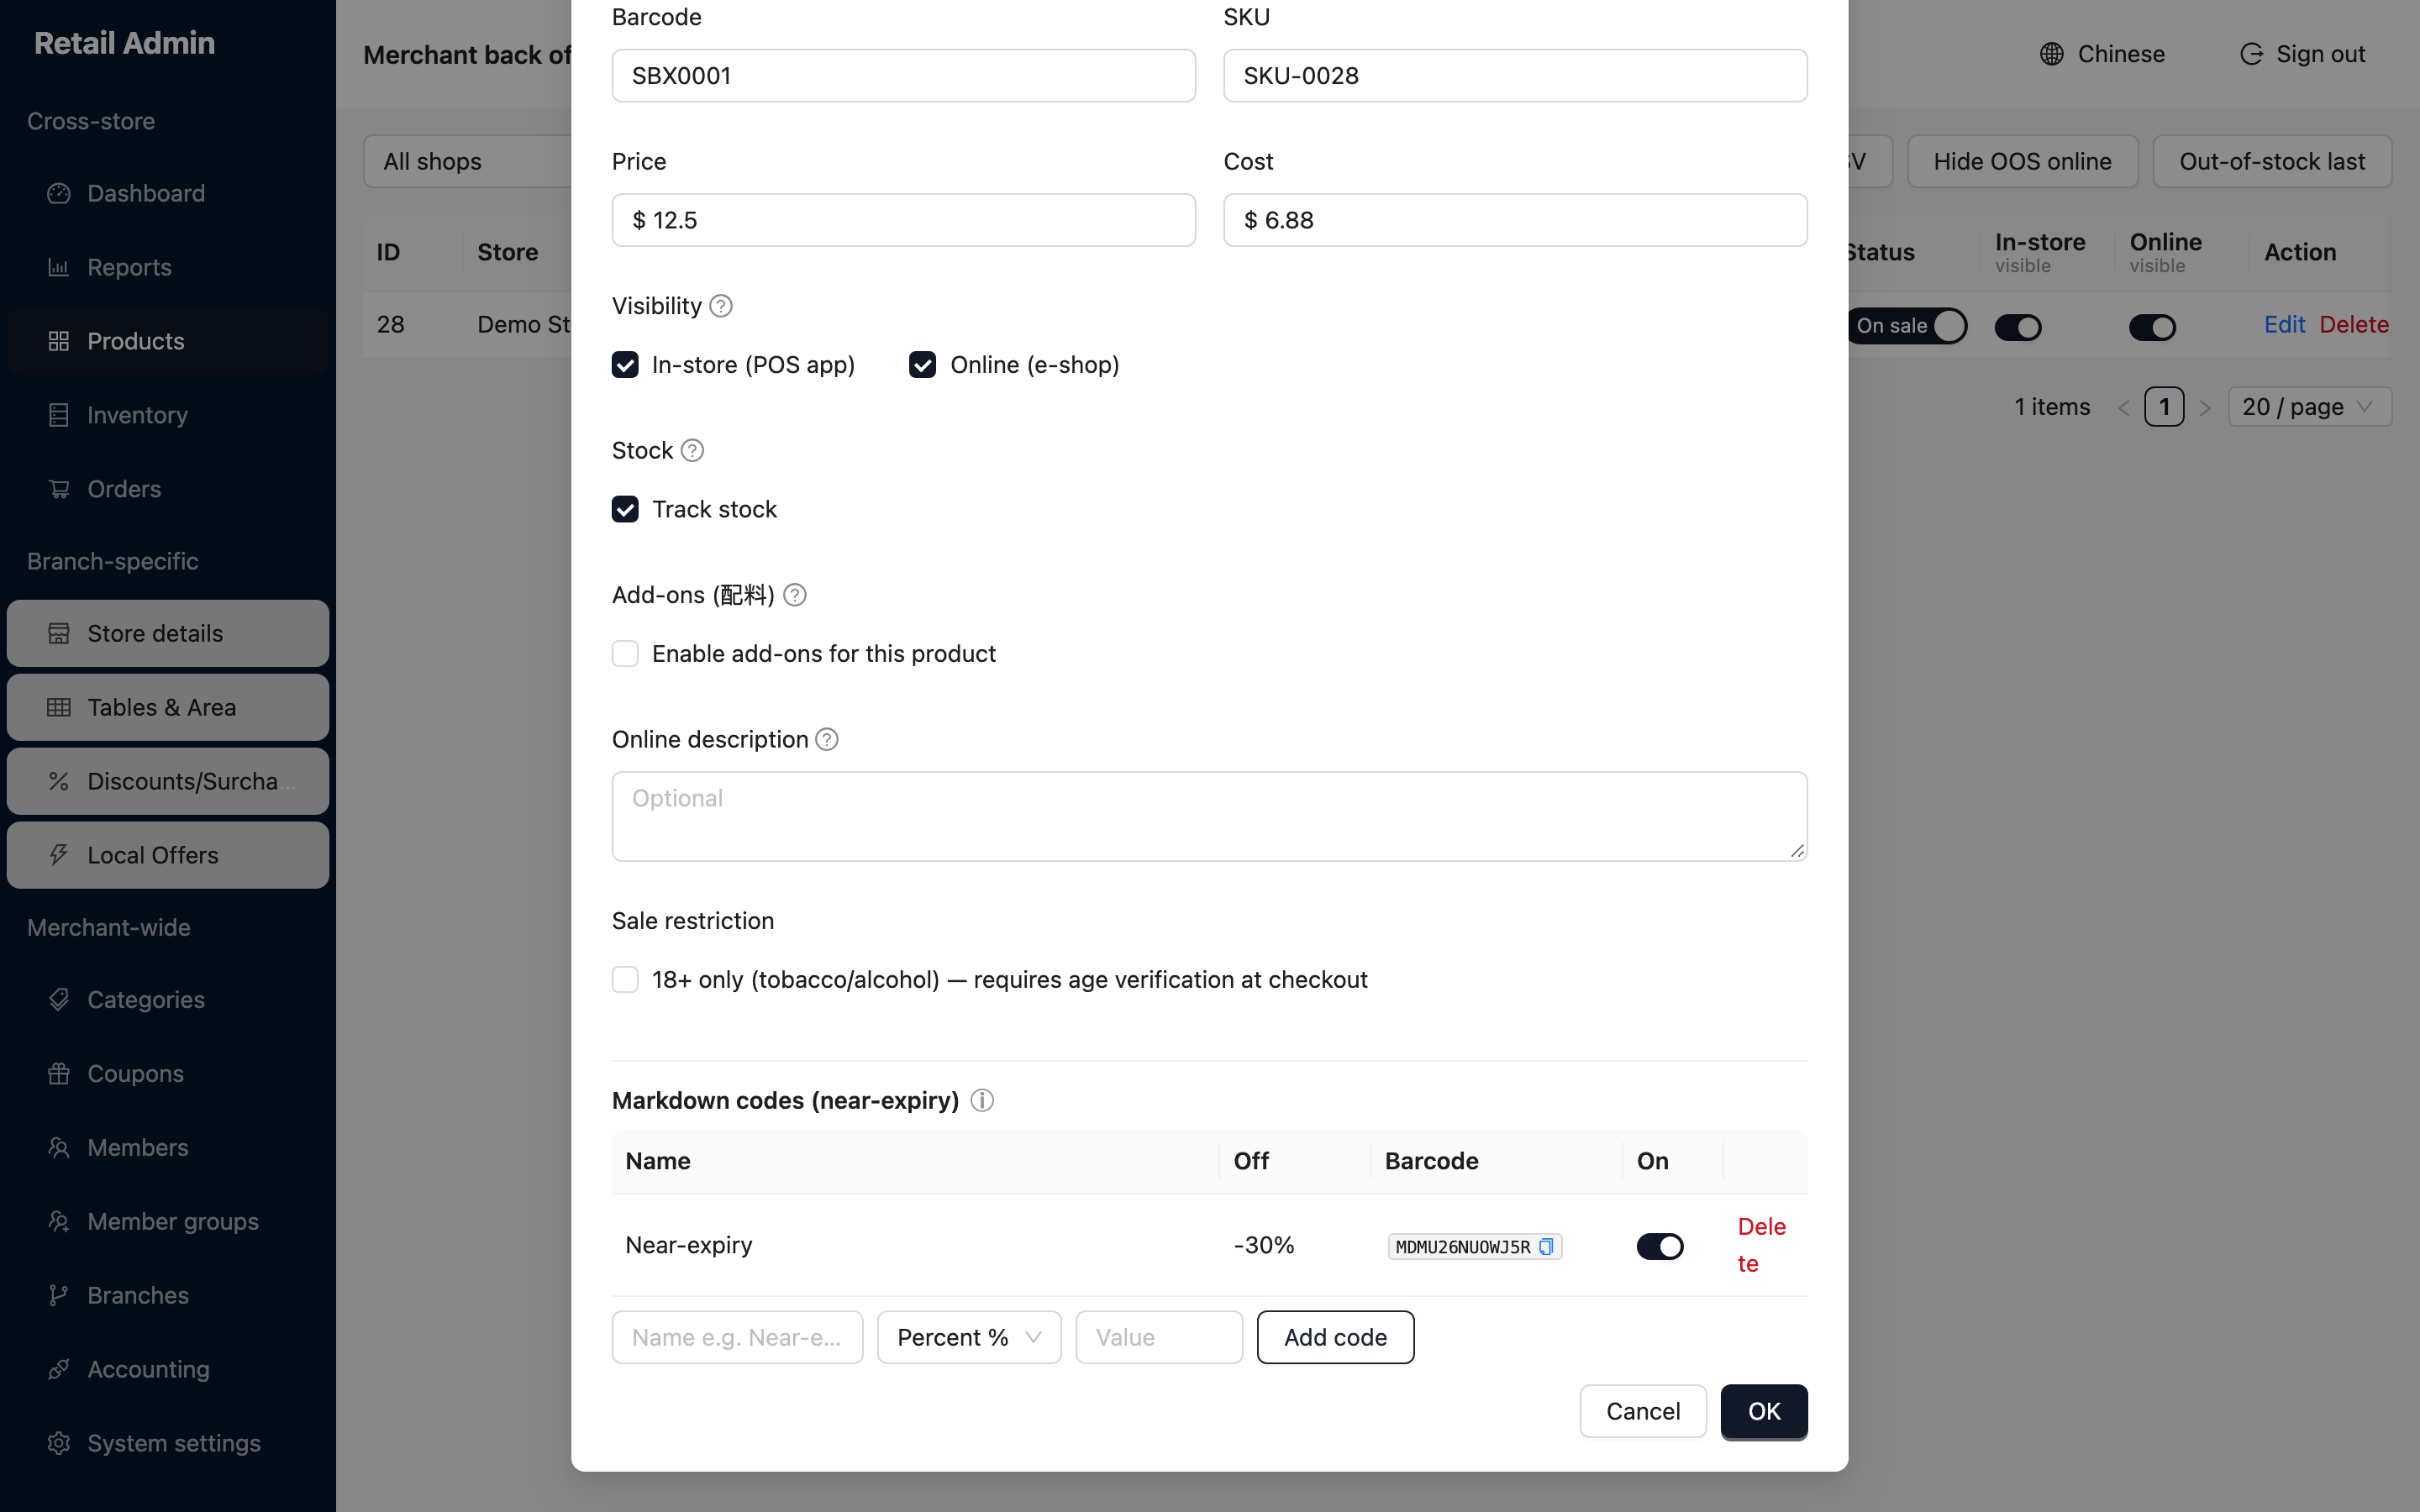
A markdown code is a barcode you print and stick on one item — bread near its date, a dented tin — so the cashier can scan the discount instead of keying it.
- Open Edit on a saved product and scroll to Markdown codes (near-expiry). On a product you have not saved yet the section says to save first and come back.
- Type a name such as
Near-expiry, choose Percent % or Fixed $, enter the value and click Add code. - The code appears in the table with its generated barcode. The switch in the On column turns it off without deleting it; Delete removes it.
Take out-of-stock items off the e-shop
- Click Hide OOS online. A confirmation asks Hide out-of-stock products from the online store?
- With All shops selected the confirmation warns that it applies to all active branches. Pick a single branch first if you only meant one.
- Click Hide. Every product with no stock has its Online visible toggle switched off.