Store details and the online store
Per-branch task. This page carries the name, address and trading switches customers see on your e-shop.
- Click Store details. Check the branch name in the picker beside the title, and change it there if you are editing the wrong branch.
- Under Basics, set the Store name customers see, the Country, a Theme color for the storefront, the Store type, a one-line Store description and a Logo image URL.
- Under Address & location, enter the Store address and Contact phone. When the address resolves, a green Located: line with the coordinates appears underneath it.
- Under Store operations, use Online store open to put the shop online (Open) or take it offline (Closed).
- Set the Store web link (slug) — the word that identifies the shop in its storefront address. The copy icon beside it copies the value.
- Turn Delivery and Pickup on or off to say which fulfilment methods the checkout offers.
- Set Online markup to Percent % or Fixed $ and enter the Value. This is what lifts online prices above shelf prices across the whole branch.
- Click Save at the top right.
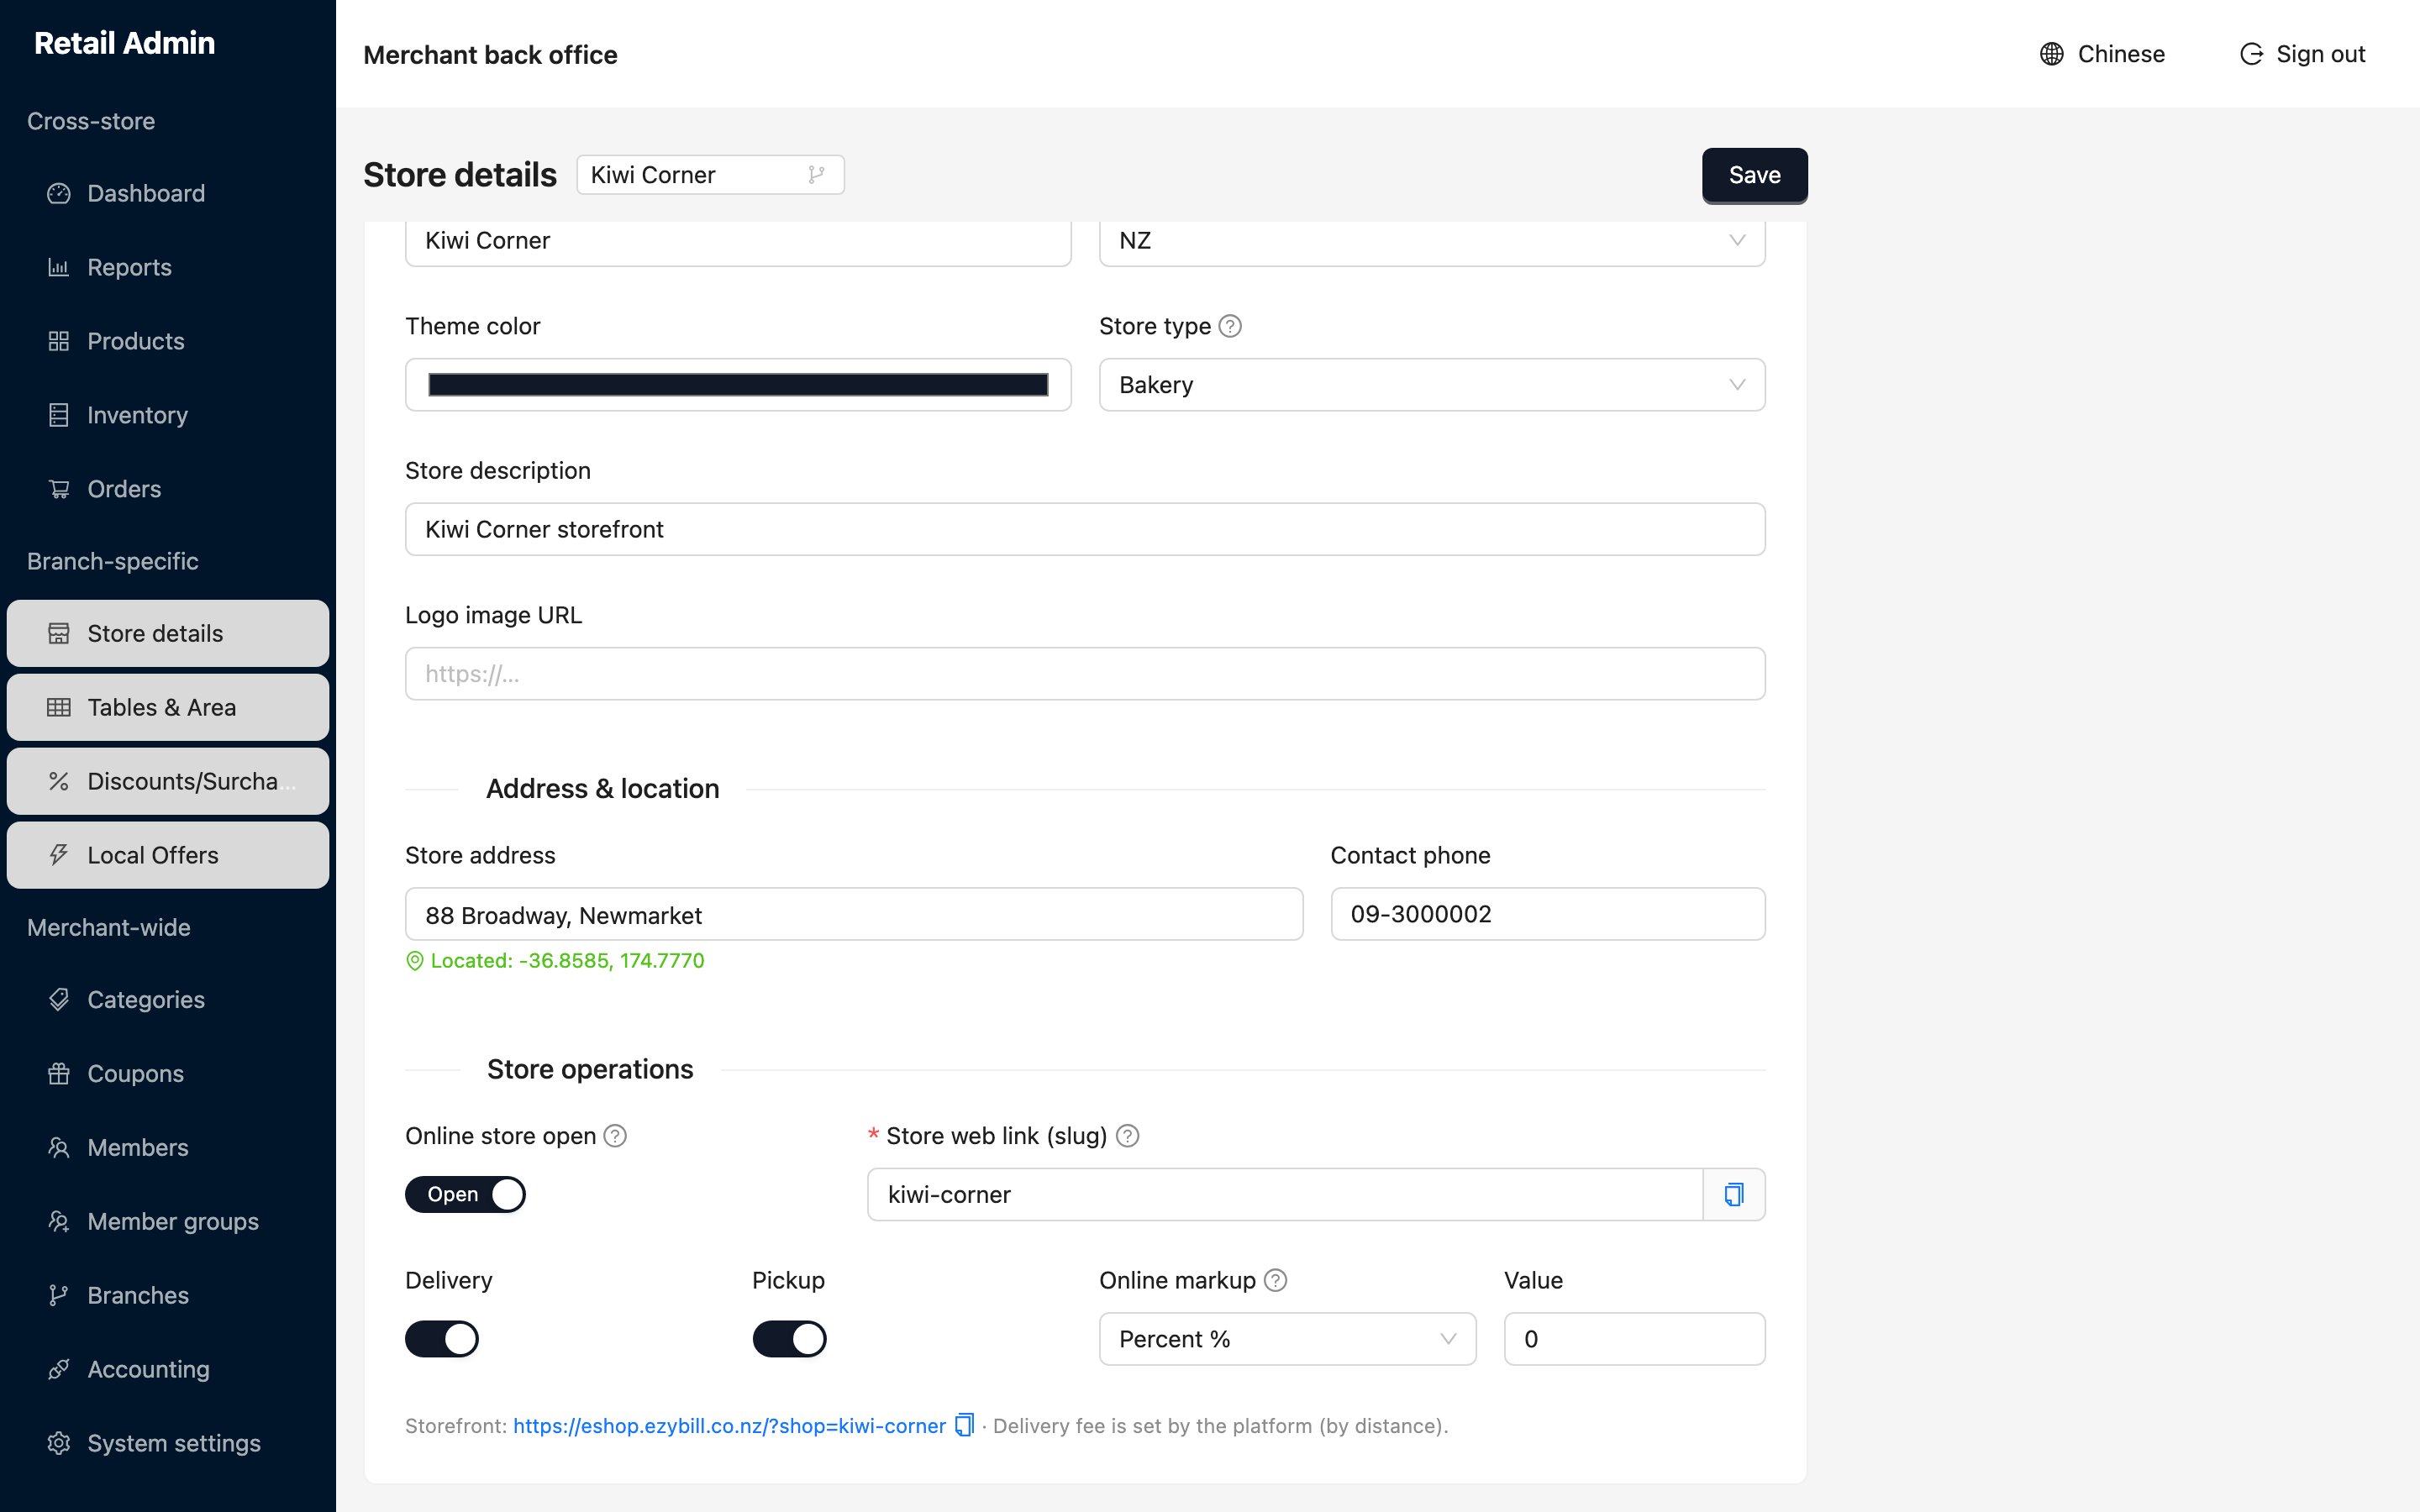
Online markup is set once per branch here — you do not set an online price on each product. The Online price column on the Products page is calculated from this value.